Tag Archives: recipes

No More Excuses

As many of you know, food is my love language. When I researched my last cookbook, I discovered 70 percent of American’s don’t cook. This absolutely amazed me! I want to help adjust that statistic! What if I told you that many meals can be made in 40 minutes or less, with healthy and unprocessed foods? We should all be concerned about the amount of processed food we eat. Studies have repeatedly shown the more processed food we consume, the less healthy we become. In less time that it takes to order takeout pizza and wait for delivery, we could have a much healthier and satisfying meal on the table for ourselves and loved ones.

To accomplish this, I will do my part by blogging two recipes per month to give you examples of how easy this can be accomplished. Stay tuned for these as we explore how easy it can be to cook healthy meals with very little prep.

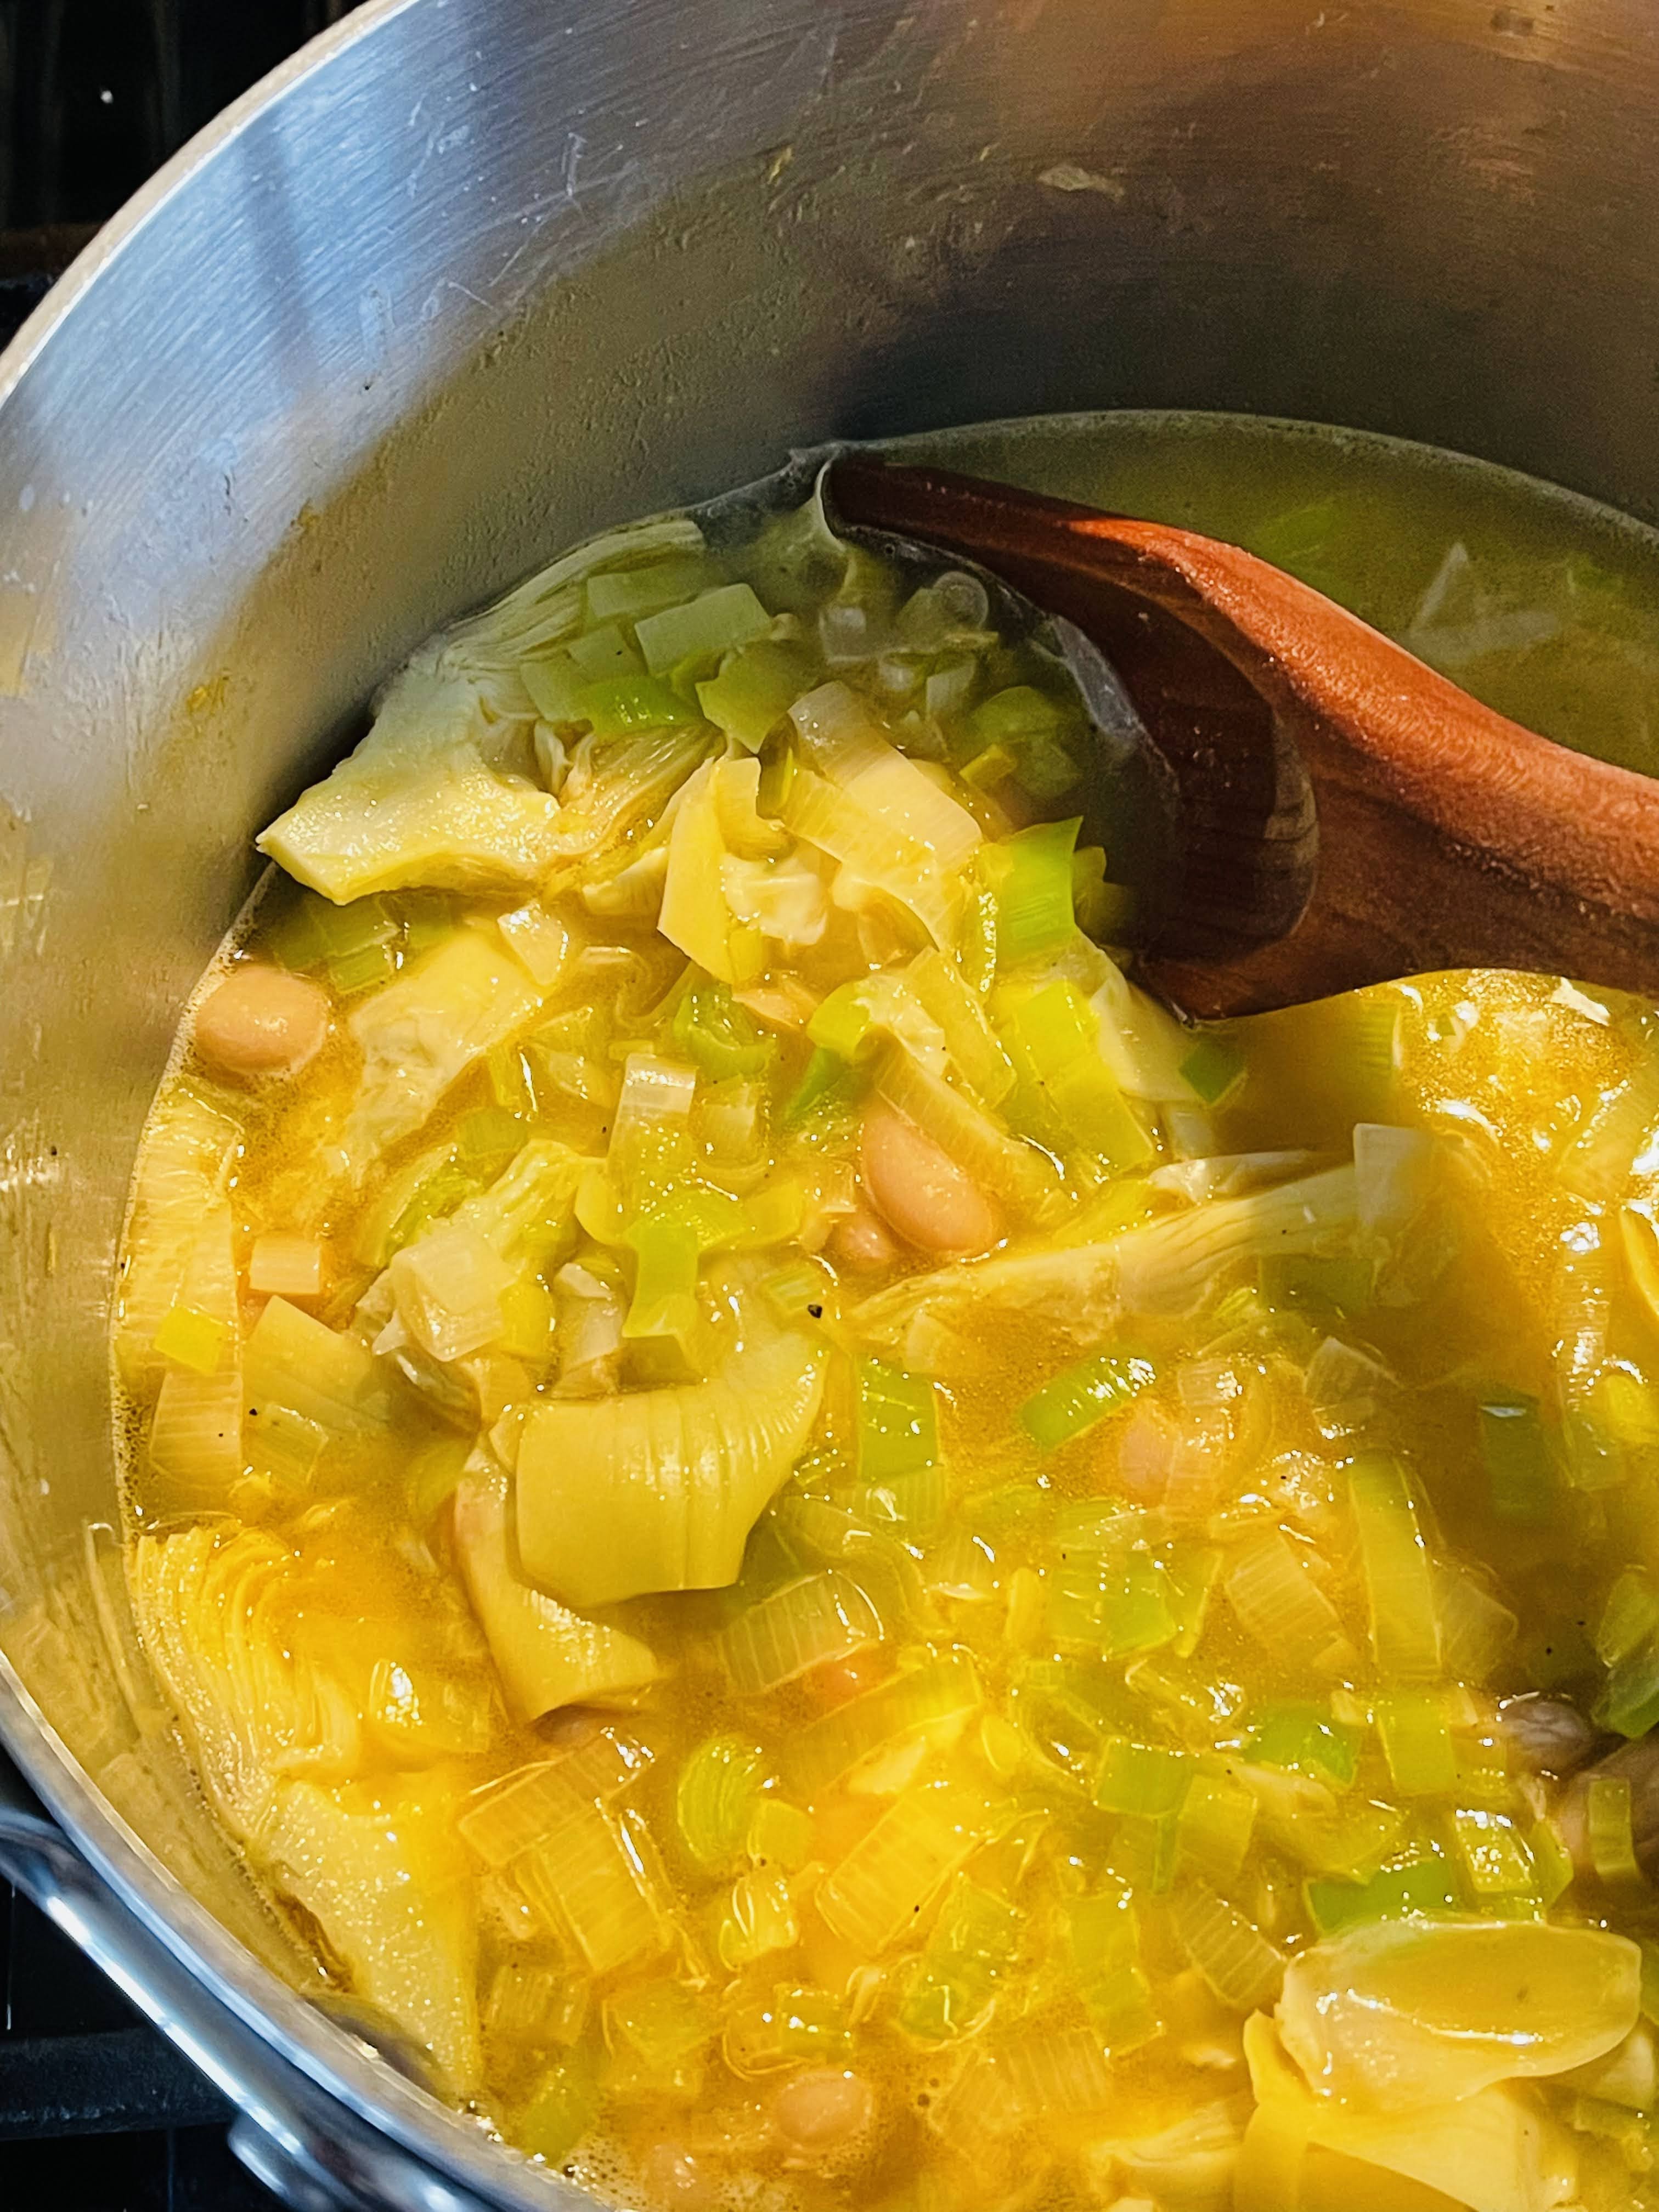
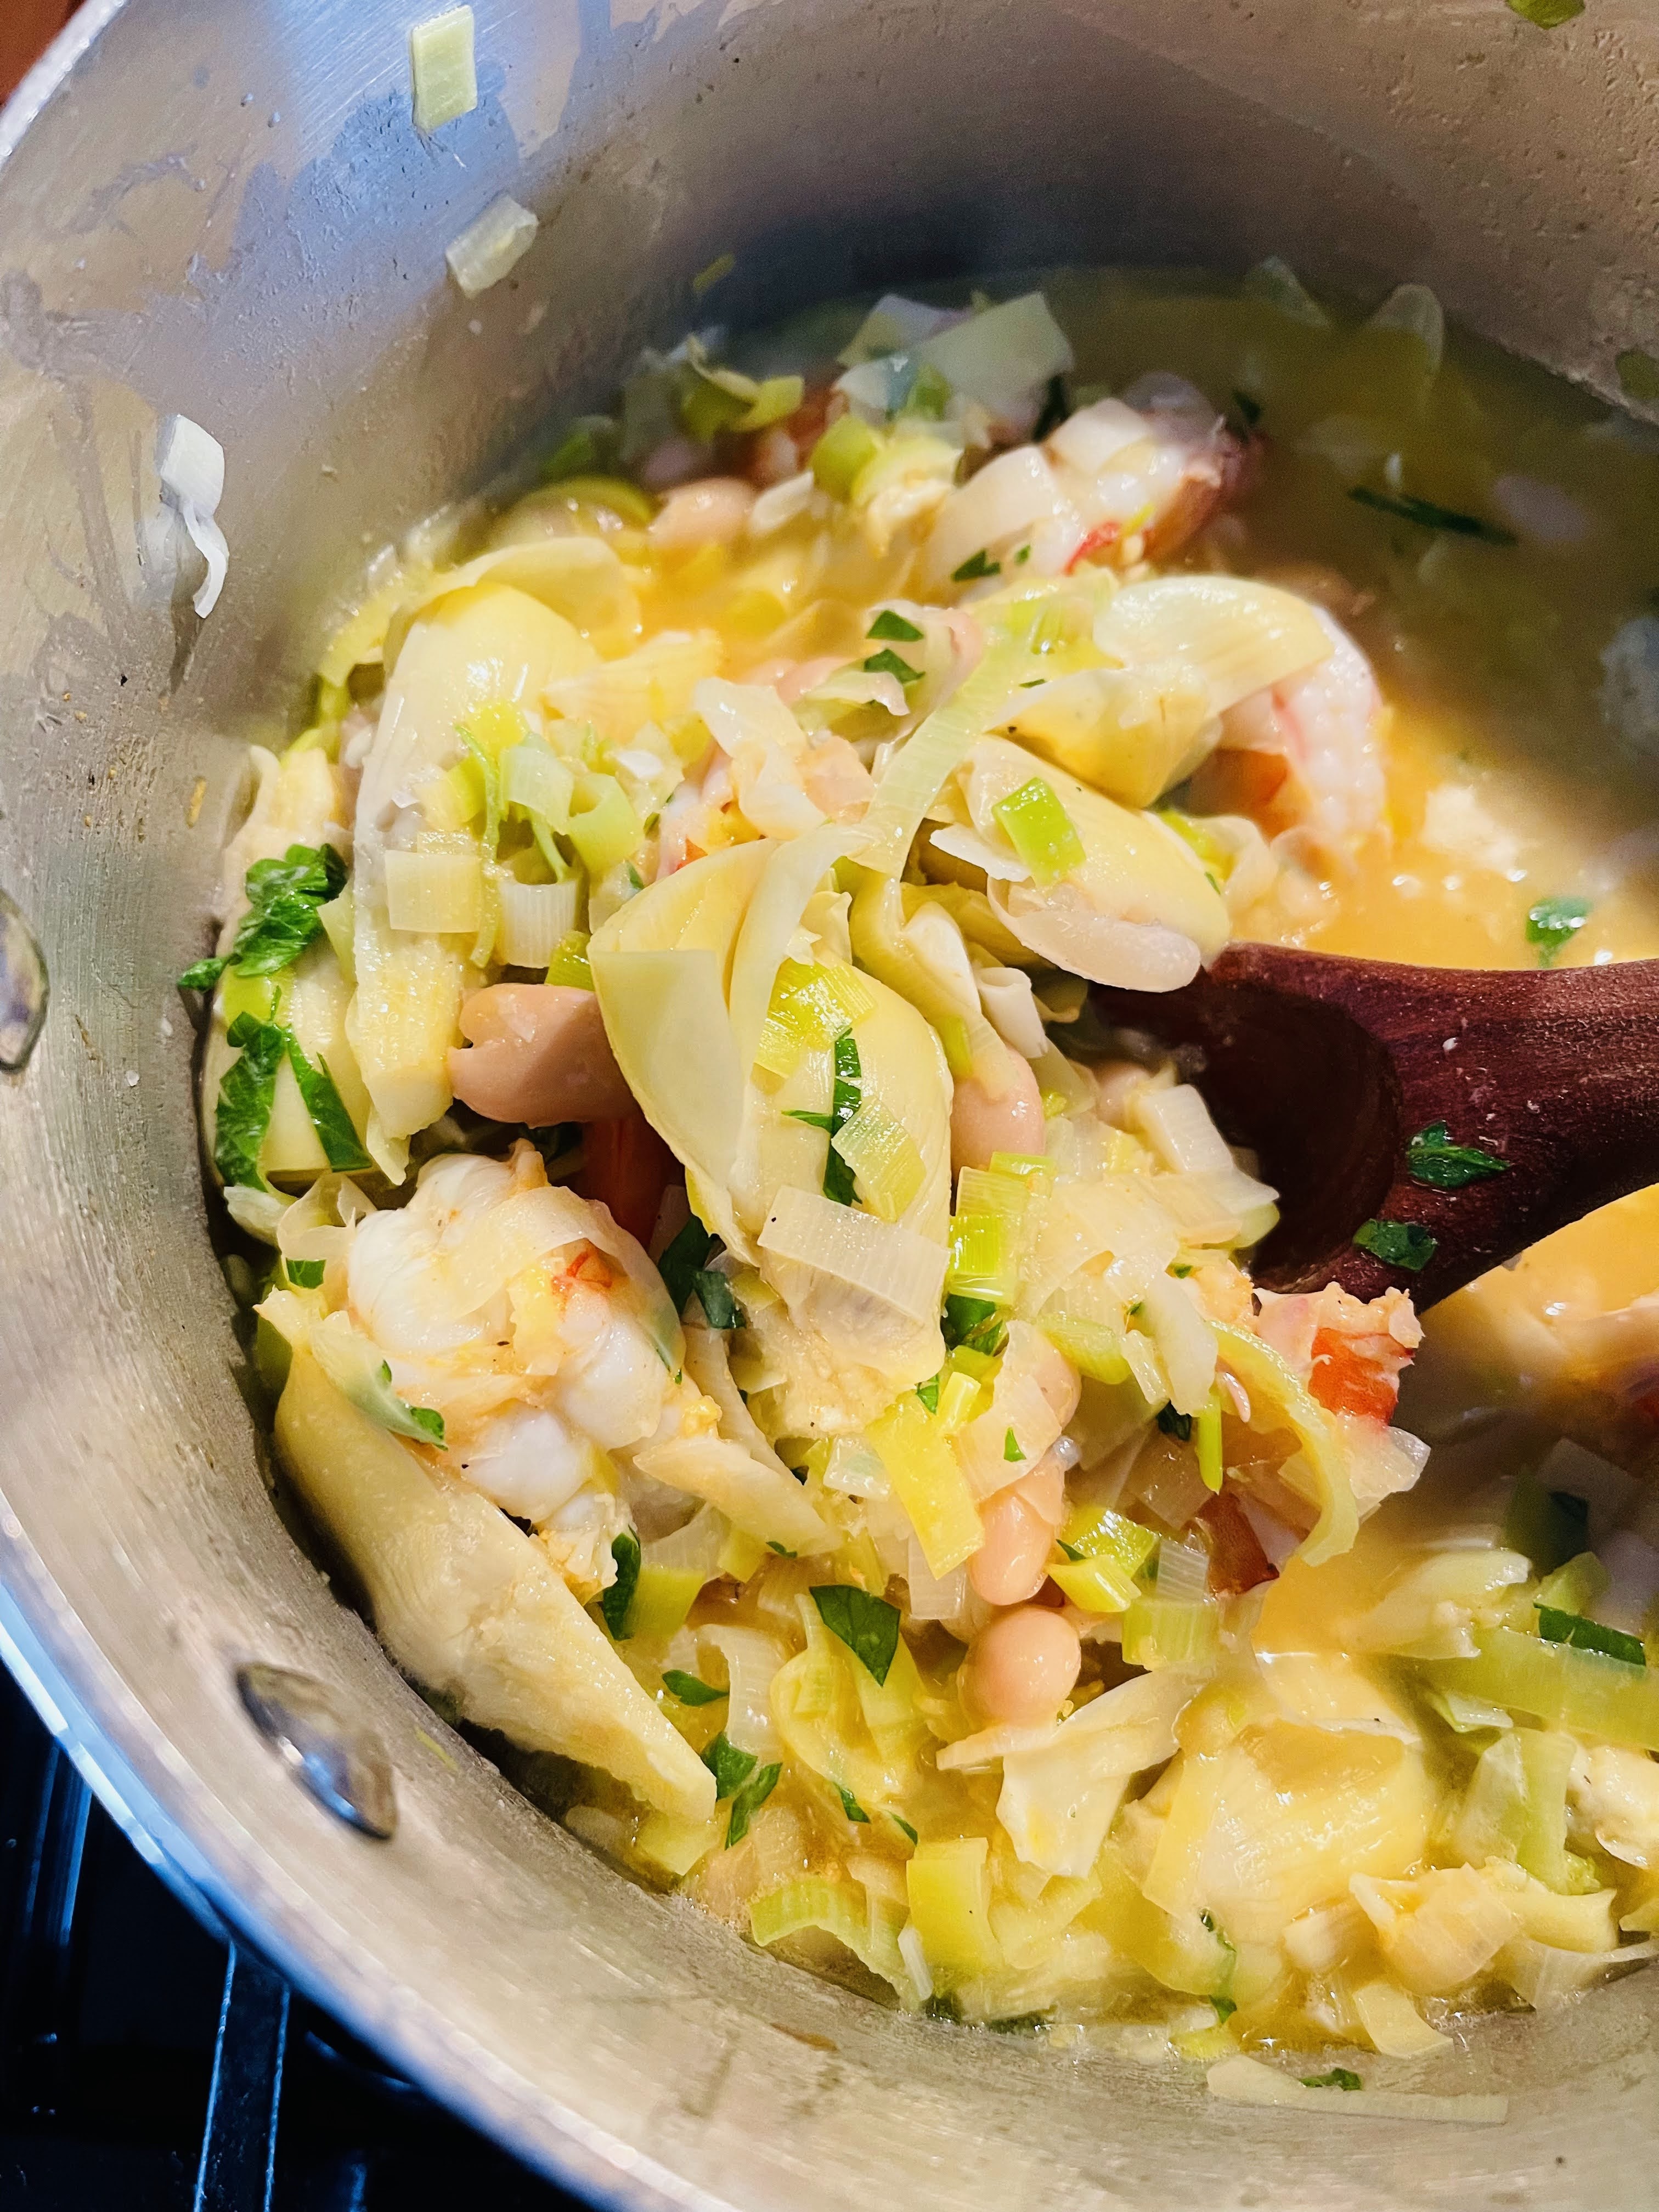
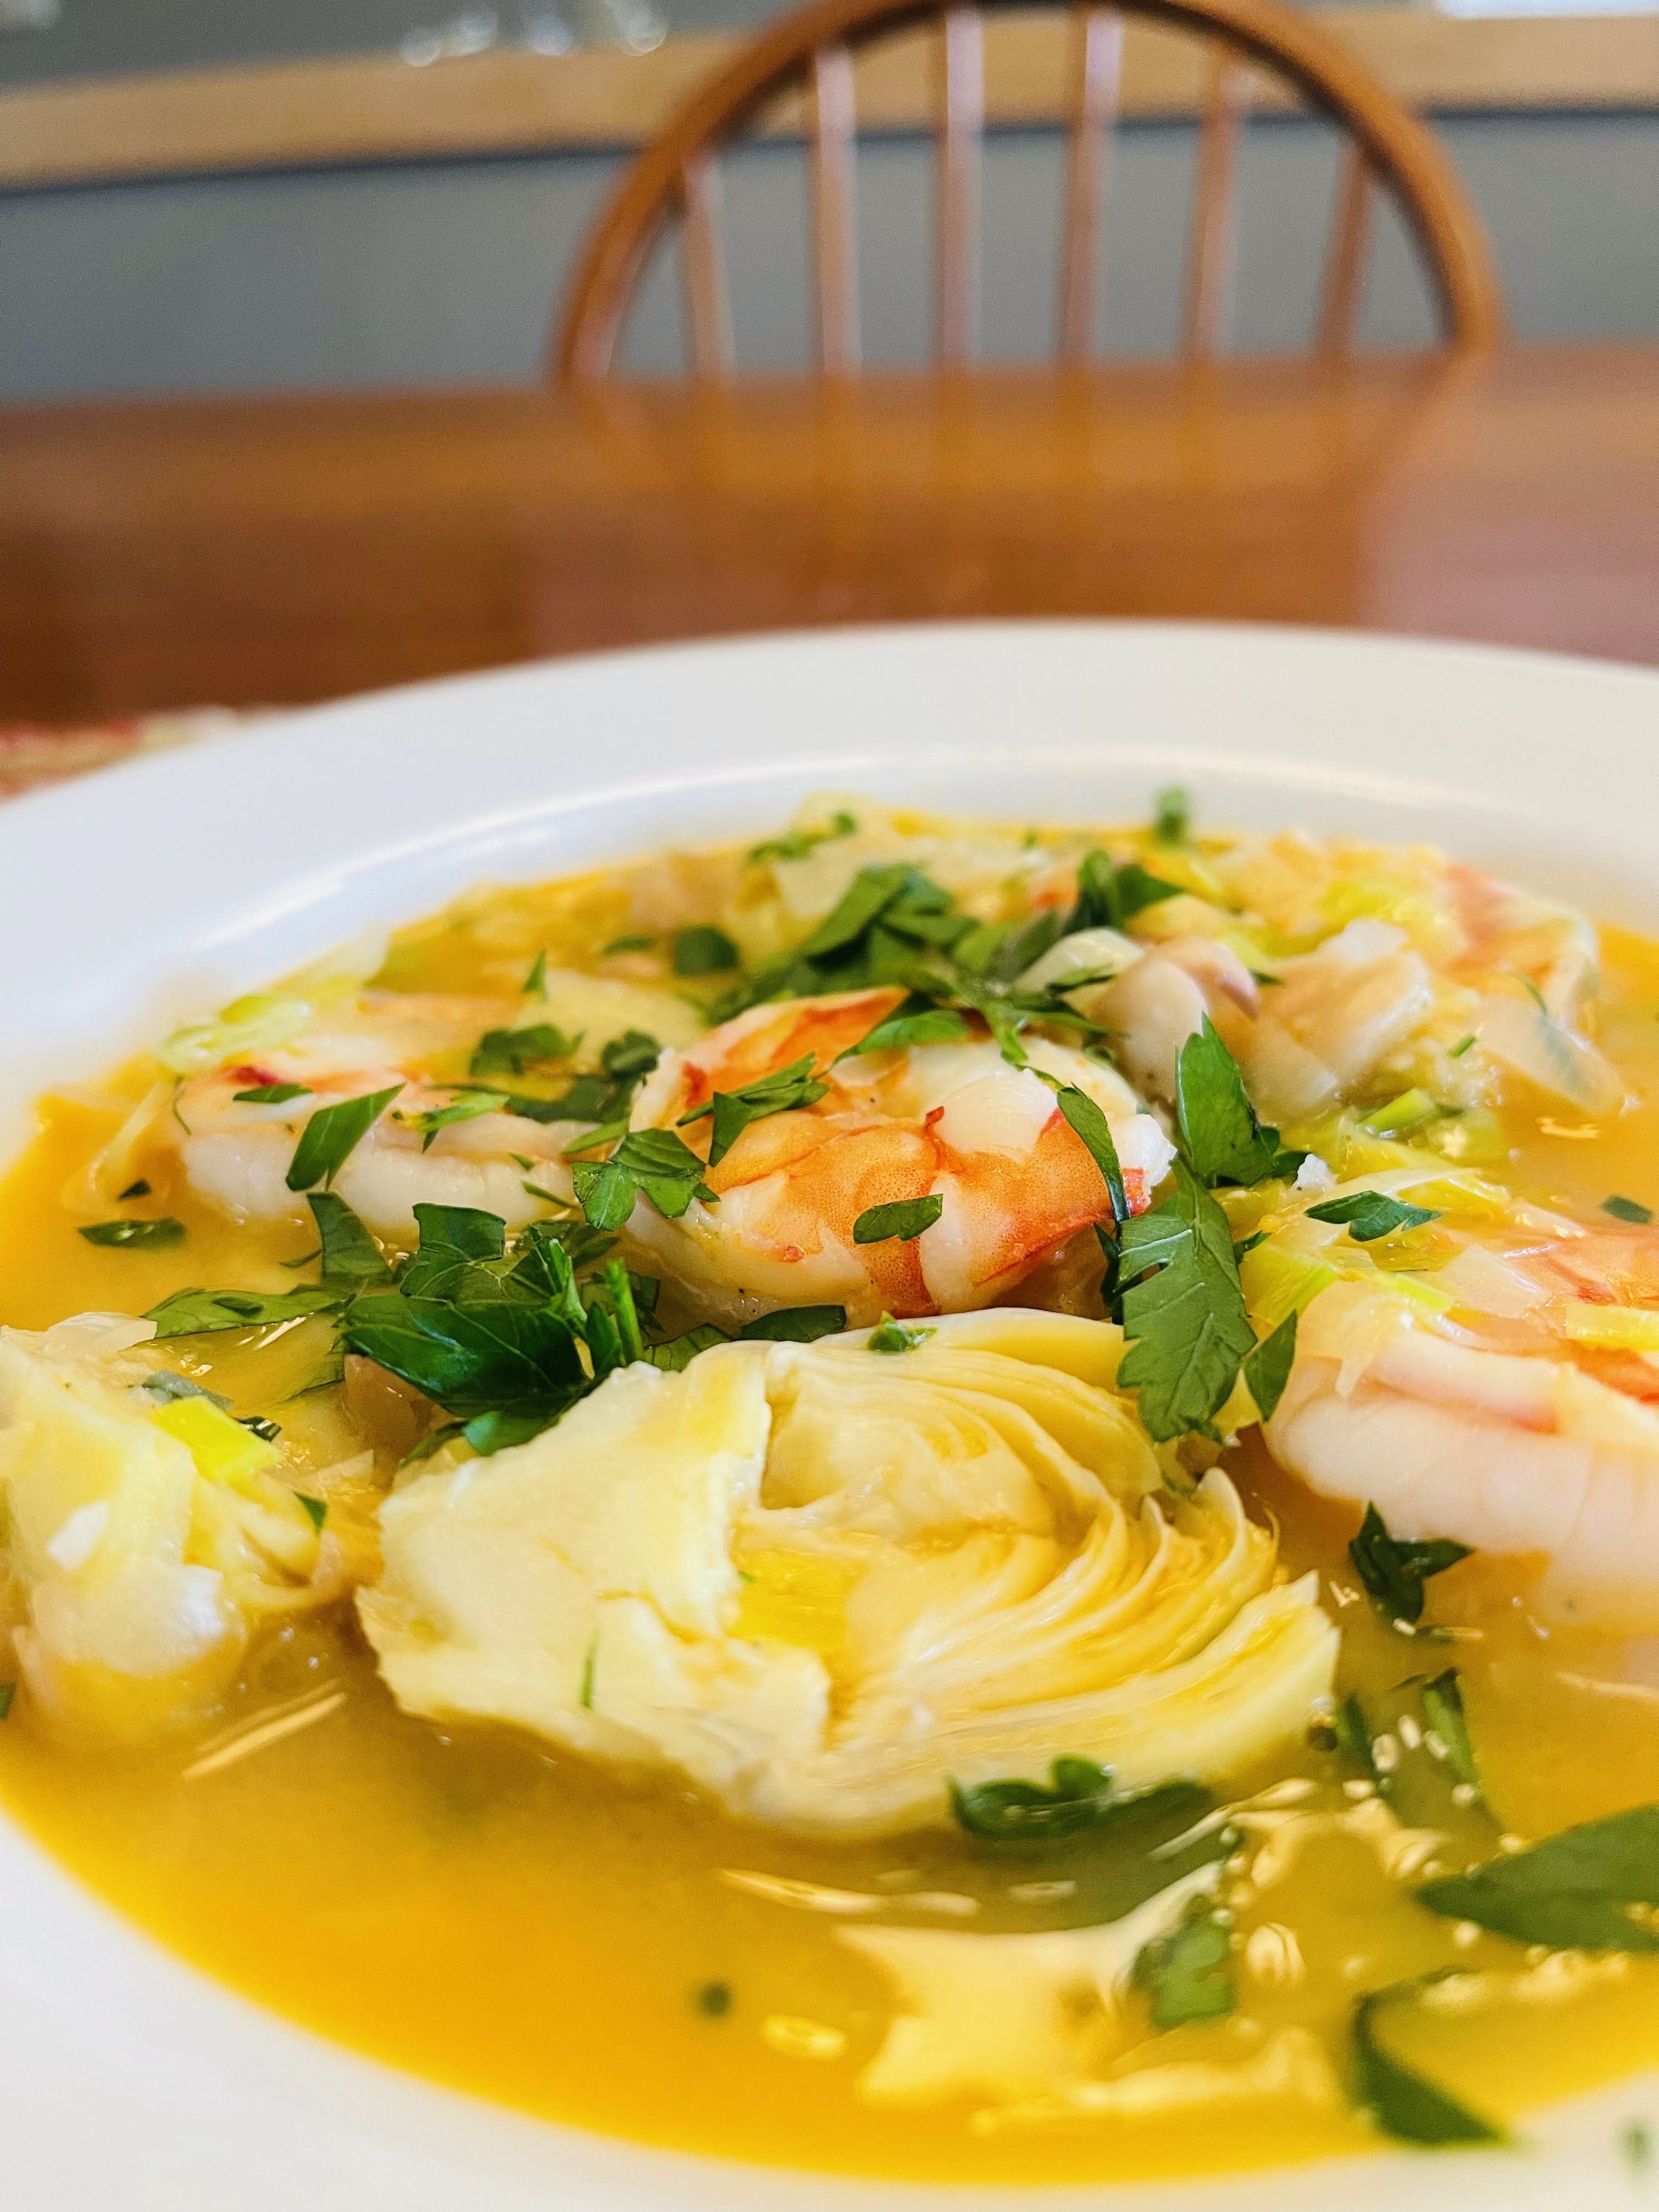
SHRIMP, BEAN AND ARTICHOKE STEW

INGREDIENTS:

  • Zest from one lemon, plus juice from half a lemon
  • 1 teaspoon of sweet paprika
  • 2 garlic cloves, grated
  • 1 pound peeled, deveined large shrimp, tail removed
  • 2 large leeks, trimmed, halved lengthwise, white and light green parts sliced crosswise 1/2 inch thick
  • 4 tablespoons unsalted butter, (1/2 stick)
  • 2 15-ounce cans cannellini beans, rinsed
  • 2 cups chicken or vegetable stock (homemade if possible)
  • 1 can whole artichokes, drained and cut in half vertically
  • 3 tablespoons finely chopped parsley

INSTRUCTIONS:

  1. Combine lemon zest, paprika, garlic, 3/4 teaspoon each of salt and freshly cracked black pepper in a medium bowl. Add shrimp and toss to coat.
  2. In a large pot, melt butter over medium-high heat. When butter is foaming, add shrimp and cook, stirring occasionally, until slightly pink, 2-3 minutes. Using a slotted spoon, transfer shrimp to a plate; set aside.
  3. Add leeks, season with salt & pepper, and cook over medium heat until leeks are soft and starting to brown on the edges, 4-5 minutes, stirring occasionally. Add beans, artichokes and stock. Bring to a boil over high heat. Lower heat and simmer 6-8 minutes. Remove from heat and stir in reserved shrimp and any juices from the plate, parsley and lemon juice. Garnish with additional chopped parsley.
  4. Serve in bowls with toasted bread. SO SIMPLE!!!

Serves 4

“Good food is often, even most often, simple food.” –Anthony Bourdain

Warmth From Within

Many of us cook foods on a seasonal rotation. I know I do. There are times when it’s healthy to get outside the box, and try something new. Ever since I started using Napa cabbage, I started digging a little deeper into Asian cooking, beyond stir-frys. We eat lot of soups during the winter, so when the temperature nosedived back into the 30’s the other day I decided to try my hand at a Chinese classic, Hot and Sour Soup. I’ve had it many times in restaurants, but have never tried to make it at home. Had I known how incredibly easy it is to make, I would have tried it sooner. You can keep it vegetarian using firm tofu, or you can make it with a 1/2 pound of cooked ground pork, or thinly sliced pork chops or pork loin. Either way, you will find it delicious!

HOT & SOUR SOUP

INGREDIENTS:

  • 8 cups chicken or vegetable stock (using homemade stock will definitely give you a MUCH better result)
  • 8 ounces shiitake or baby bella mushrooms, (I used bella’s), thinly sliced, stems discarded
  • 1 (8 – ounce can) bamboo shoots, drained and julienned
  • 1/3 cup rice vinegar, or more to taste
  • 1/4 cup soy sauce (I use Bragg’s Liquid Aminos)
  • 2 teaspoons ground ginger
  • 2 generous teaspoons chili-garlic sauce
  • 1/4 cup cornstarch
  • 2 large farm-fresh eggs, whisked
  • 8 ounces firm tofu*, compressed dry with paper towels, then sliced and cut into 1/4 inch cubes
  • 4 green onions, thinly sliced
  • 2 teaspoons toasted sesame oil
  • Kosher salt and white pepper

INSTRUCTIONS:

  1. Set aside 1/4 cup or your chicken or vegetable stock to make a slurry for the soup.
  2. Add remaining 7 3/4 cups of stock, mushrooms, bamboo shoots, rice vinegar, soy sauce, ginger, and chili-garlic sauce to a large stock pot, and stir to combine. Heat over medium heat until the soup reaches a simmer.
  3. While the soup is heating, whisk together the 1/4 stock that was set aside with the cornstarch in a small bowl until completely smooth. Once the soup has reached a simmer, swirl in the cornstarch mixture pouring it in slowly. Continue to stir until soup has thickened, about 1-2 minutes.
  4. Continue stirring the soup in a circular motion, then drizzle in the eggs in a thin stream as you stir the soup to create egg ribbons. Stir in the tofu, half of the green onions, and sesame oil. Season with salt and white pepper to taste.
  5. Serve immediately, garnished with extra green onions.

Serves: 6-8

*NOTE: Consider freezing your tofu before using. This step will help release additional moisture from the tofu, making it firmer.

“Real soup is to the body what peace is to the soul.” ~ Isabel Allende

Gotta Have Crunch!

I’m one of those people where the texture of food is very important. Just like having a combination of savory to sweet and acid to fat, the texture of a dish adds to its interest. I find this to be particularly true when it comes to salads. For me, every salad has to have an element of crunch! Salads do not have to be constructed with the honeymoon approach (lettuce alone). I want a salad that is seasonal, colorful, crunchy and delicious.

Recently, I was totally gobsmacked when I realized I have never used Napa or Chinese cabbage at home. How can this be? I love cabbage! So when a recipe for an Asian salad popped up on my internet feed, I took a look. Because I’m slightly anal about this, I changed some things, and made a completely different dressing than the one suggested. The Miso-Sesame Vinaigrette worked beautifully. This salad is now my new obsession! It’s also perfect for those of us that eat a fair amount of chicken. I roast a whole chicken about every other week, so the leftovers are perfect for this salad. No leftovers? Grab a store-bought rotisserie chicken and you’re have way done! I even ordered three Napa seed varieties for our farm. I know I will be experimenting with this delicious, crunchy ingredient in the next few months.

ASIAN SHREDDED CHICKEN SALAD

INGREDIENTS:

FOR THE SALAD:

  • 2 heaping cups of cooked and shredded leftover, or store-bought rotisserie chicken
  • 4 heaping cups thinly sliced napa cabbage
  • 4 scallion, thinly sliced
  • 1 cup shredded carrots
  • 1 cup English or Persian cucumber, diced
  • 1 red bell pepper, seeded and chopped
  • 1/2 cup fresh mint, roughly chopped
  • 1/2 cup fresh cilantro, roughly chopped
  • 1/2 cup toasted almonds

FOR THE MISO-SESAME VINAIGRETTE:

  • 2 medium garlic cloves, smashed
  • 1 small shallot, roughly chopped
  • 2 tablespoons tamari or Braggs liquid aminos
  • 2 tablespoons balsamic vinegar (white or reg)
  • 2 tablespoons red or white wine vinegar
  • 1 tablespoon miso paste of your choice (white or red)
  • 1 tablespoon dark brown sugar
  • 1/2 cup sunflower, avocado or vegetable oil
  • 2 tablespoons toasted sesame oil
  • 2 tablespoons black sesame seeds

INSTRUCTIONS:

  1. In a large bowl, combine all the salad ingredients except for the nuts. In a small food processor or quart jar, using a stick blender, combine all the ingredients for the dressing, except the oil and sesame seeds. Blend dressing ingredients until smooth. Slowly add the oil, blending until emulsified. Stir in sesame seeds.
  2. Right before serving, toss the salad with the 1/4-1/2 cup of the dressing. Garnish with nuts and more sliced green onions. Serve cold.
“Pray for miracles, but plant cabbages.”
― Ken Follett

A Beautiful Nightshade

It sometimes surprises me when a standard recipe hasn’t come up on my radar. I’m one who doesn’t really like ground beef so I’ve never made stuffed peppers. I know, it seems odd to me too; most people eat them with enthusiasm. So when my wife asked me to make them, I wondered what I needed to change so I would be enthusiastic too? I immediately swapped out the ground beef for ground lamb. I also wanted them to be visually appealing, not buried under a bunch of cheese making the pepper unidentifiable. So instead of covering them with cheese I incorporated feta in the meat mixture, giving them a Greek theme. I gave them a little whimsy by standing them up with little hats, instead of cutting them in half and laying them down. The final product turned out so good I will have them on a regular rotation. Who knew? You can teach an old dog new tricks.

GREEK STUFFED PEPPERS

INGREDIENTS:

  • 1 pound grass-fed ground lamb
  • 1 1/4 teaspoons Kosher salt, divided
  • 4-6 large colored sweet peppers (I like red & yellow), Cut the tops of at about 3/4 of an inch, removing the stem of each pepper, remove membranes and seeds.
  • 3 tablespoons extra-virgin olive oil, divided
  • 1 medium yellow onion, finely chopped
  • 4 cloves garlic, minced
  • 1 teaspoon oregano
  • 1/2 teaspoon Kosher salt
  • Freshly ground black pepper to taste
  • 2 cups tomato sauce, preferably homemade, divided
  • 2 tablespoons tomato paste
  • 1 cup cooked rice, or other grain of choice
  • 8 ounces feta, crumbled

INSTRUCTIONS:

  1. Preheat oven to 425 degrees F. Set oven rack to middle position.
  2. Depending on the number of peppers you are using, place the peppers cut side up, in a 8×8 or 9×13 baking dish. Drizzle 1 tablespoon of the olive oil, and sprinkle with 1/2 teaspoon salt. Place each pepper top on peppers. Cover with foil (shiny side toward peppers), and place in oven for 30 minutes.
  3. Meanwhile, heat the remaining 2 tablespoons of oil over medium heat in a large nonstick skillet. Add onion and saute stirring frequently, until translucent about 3-4 minutes. Add garlic and cook 1 minute more; do not brown. Add ground lamb, salt, pepper and oregano and increase heat to medium-high, breaking up meat with a wooden spoon. Cook until mostly cooked through, about 5 minutes. Add 1/2 of tomato sauce, tomato paste and bring to a boil; reduce the heat to medium low, and cook, uncovered until meat is cooked through, 3-4 minutes. Add the rice, stir to combine. Take off heat and add feta.
  4. Remove peppers from oven and spoon the remaining tomato sauce around the peppers. Fill each pepper with meat mixture, and cover with the tops of each pepper. Bake for an additional 25 minutes.
  5. Spoon tomato sauce in shallow bowl, place a pepper on top of sauce, and spoon additional sauce over pepper. Serve hot.

Good food & a warm kitchen, are what make a house a home.”

A Beautiful Brassica!

It seems that cauliflower is having a moment. For decades this lowly forgotten vegetable was relegated to the back of the freezer section. I never had it as a child, as my mother preferred its green cousin broccoli. As far as a fresh head of the stuff, what? What do I do with this? Now it seems its having a well deserved renaissance. I have found it to be an extremely versatile vegetable. Yes, you can steam it, but you can also roast it, make salads with it, turn it into a cake, use it as a rice substitute, make tacos, pizza crust, fritters, even steaks.

But if you want to impress your company, I suggest you roast it whole and give it center stage. In this rendition a head of cauliflower is covered with lemon juice, olive oil and ground pistachios, then roasted. Once roasted a delicious pistachio cream sauce is drizzled over its crown. Cut in wedges with additional sauce and fresh parsley and listen for the ooos and ahhhs.

PISTACHIO-CRUSTED CAULIFLOWER

INGREDIENTS:

  • 1 medium to large cauliflower head, trimmed of outer leaves, leaving core in tact
  • 1/2 cup roasted and salted pistachios
  • Freshly ground black pepper to taste
  • 1 tablespoon + 2 teaspoons extra virgin olive oil, divided
  • 8-12 cups water to fully submerge your head of cauliflower
  • Juice of one lemon
  • 2 teaspoons salt
  • 2 teaspoons lemon juice

FOR PARSLEY PISTACHIO CREAM SAUCE:

  • 1/4 cup roasted and salted pistachios
  • 1/4 cup water (plus more to thin sauce if necessary)
  • 1/3 cup loosely packed parsley leaves, plus more for garnish
  • 3 tablespoons fresh lemon juice
  • 1 tablespoon extra virgin olive oil
  • Kosher salt and freshly cracked black pepper to taste

INSTRUCTIONS:

  1. Preheat oven to 350 degrees F.
  2. Using a food processor, grind 1/2 cup of the pistachios and add a few grinds of pepper, 2 teaspoons of olive oil and mix until combined. Set aside.
  3. In a large stock pot, add 8-12 cups water (enough for your head of cauliflower to be completely submerged upside down in the water). Add juice from one lemon and 2 teaspoons of salt. Bring to a boil. Once boiling, submerge the cauliflower in the water upside down. Boil for 11-14 minutes or until a knife inserted into the core meets only a slight resistance. Transfer the cauliflower to a colander face up and let sit for 15 minutes to drain.
  4. Place the cauliflower in an oven proof dish and drizzle 2 teaspoons of lemon juice and 1 tablespoon of olive oil and rub it all over the crown. Sprinkle with salt and a little garlic powder. Press the ground pistachios all over the crown and sides of cauliflower. Place on the middle rack of your oven and roast for 20-25 minutes until cooked through and golden. If the pistachios start to get too brown, cover with a sheet of aluminum foil.
  5. Meanwhile, prepare the pistachio cream sauce. In a food processor or high speed blender, add the 1/4 cup pistachios, water, and parsley and process until smooth. Add the lemon juice, olive oil, salt and pepper to taste, and process to combine. If sauce is too thick, add 1 tablespoon of water at a time until desired consistency is reached (you want to be able to pour it over the cauliflower).
  6. Remove cauliflower from oven and let rest for 10 minutes. Place on serving plate and drizzle generously with cream sauce. Garnish with chopped parsley, cut into wedges and pass additional cream sauce.

Serves 4-6 (depending on your size of cauliflower head)

“Cauliflower is nothing but a cabbage with a college education.”