Author Archives for twistedbasics

Unknown's avatar

About twistedbasics

Welcome! Food is my focus, livelihood, art form and my passion. My wife and I run a 5.5 acre organic vegetable farm. Join me fellow foodie as we explore the changing seasons and the food it brings.

I’ve Gone Nuts

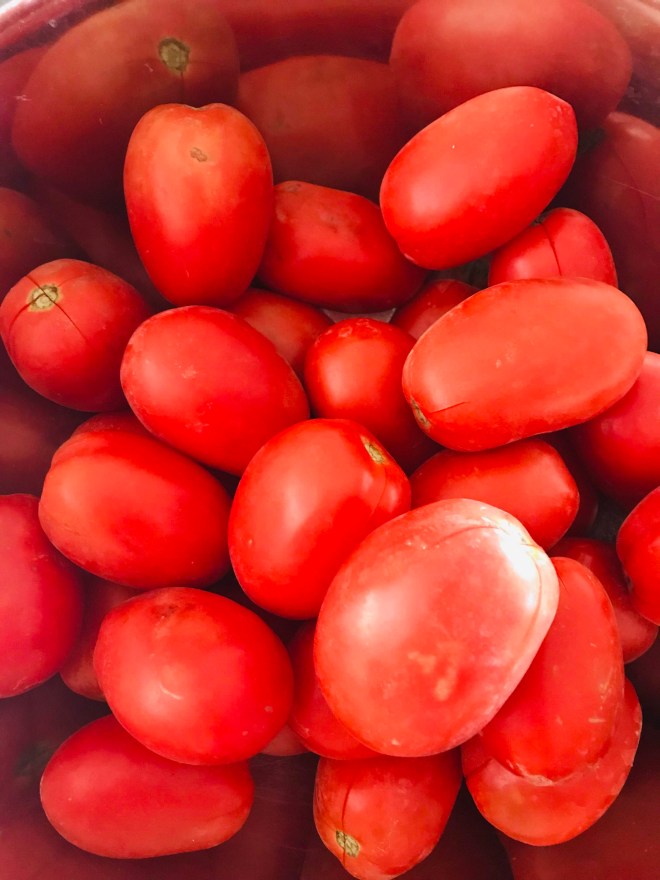
Seasonal.  We are entering the threshold of fall.  Tomatoes are waning, sweet corn is done; but there are wonderful options that are showing up at the farmers market stalls.  Peppers, for example are prolific right now.  I love them roasted, and rely on them in jars during winter; but what if you change something traditionally done with roasted and made it with fresh peppers?  Muhammara, a Syrian spread is traditionally made with roasted Aleppo peppers (although jarred roasted peppers work just fine).  It also has bread and walnuts in combination with the roasted peppers.   I wondered what would happen if I used fresh peppers and additional varieties of nuts?  Game on.

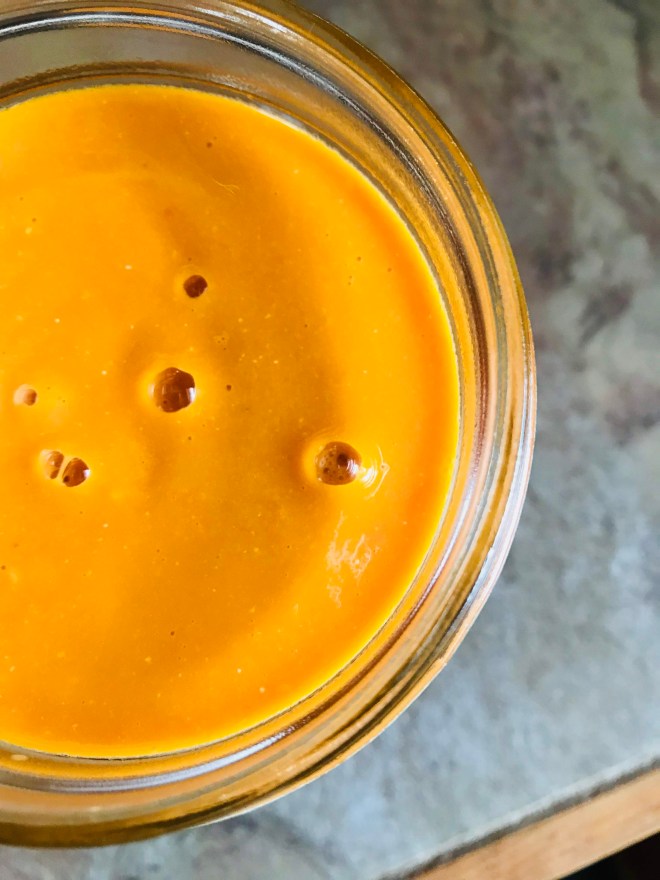
FRESH RED PEPPER AND NUT SPREAD

img_5005

INGREDIENTS:

  • 1/4 cup vegetable oil (I use avocado oil)
  • 1/4 cup pine nuts
  • 1/4 cup sliced almonds
  • 1/2 cup walnut pieces
  • 1/4 cup unsalted roasted pistachios
  • 3 medium red bell peppers, about 1 pound, seeded and cut into 2″ chunks
  • 1 medium sweet onion (I used Wall Walla), cut into chunks
  • 1/3 cup toasted bread crumbs
  • 1/2 cup extra-virgin olive oil
  • Kosher salt and freshly ground black pepper to taste
  • 1/2 teaspoon ground cayenne pepper

img_5006

img_5007

DIRECTIONS:

  1. Heat oil in a 10 inch skillet over medium heat.  Add walnuts and saute for about 3-5 minutes until lightly toasted.  Remove with slotted spoon and place in bowl of food processor.
  2. Add pine nuts and almonds to same skillet.  Saute for 2 minutes, until lightly golden.  Remove with slotted spoon to plate lined with paper towels.
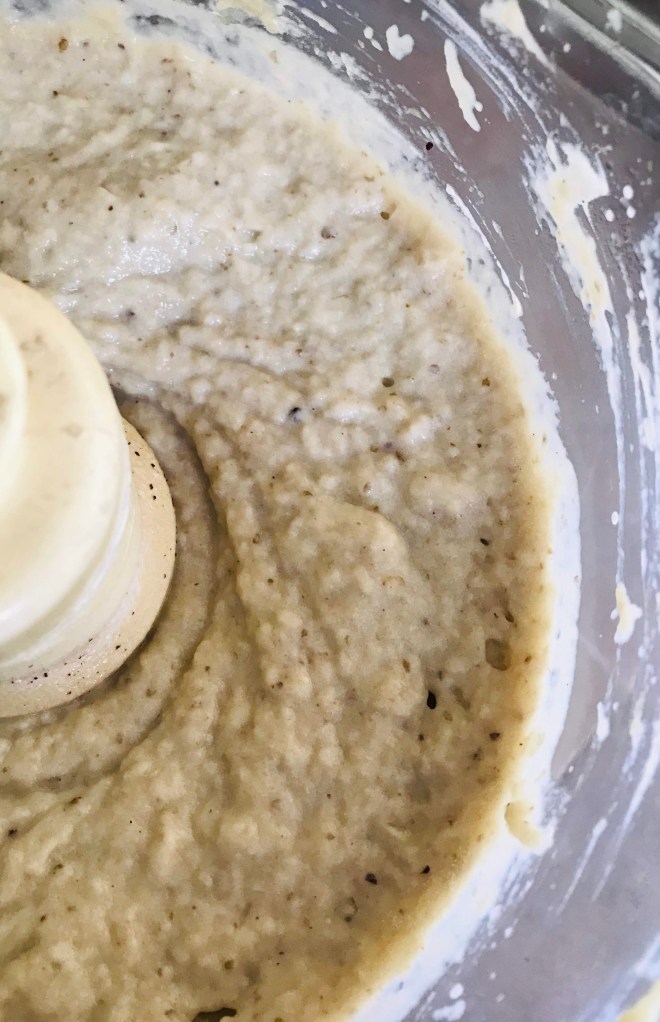
  3. Add pistachios to food processor bowl and pulse until finely chopped.  Place in medium bowl.
  4. Add red pepper and onion to food processor bowl.  Pulse until fine.  Transfer to mesh strainer to remove liquid.  Let stand for 5 minutes.
  5. Add strained peppers and onions to bowl.  Stir in pine nuts, almonds, breadcrumbs and olive oil.  Season with salt, pepper and ground cayenne.
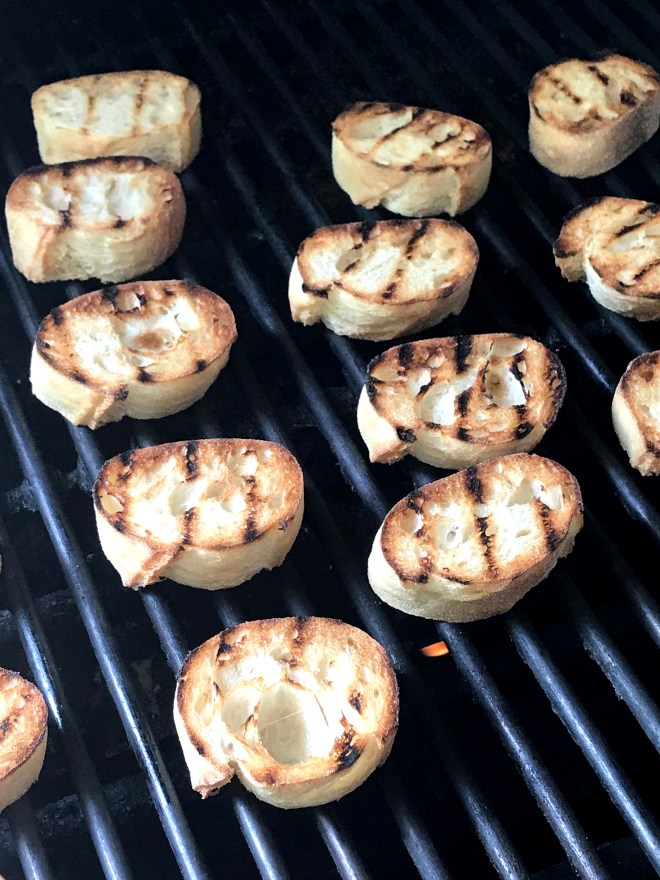
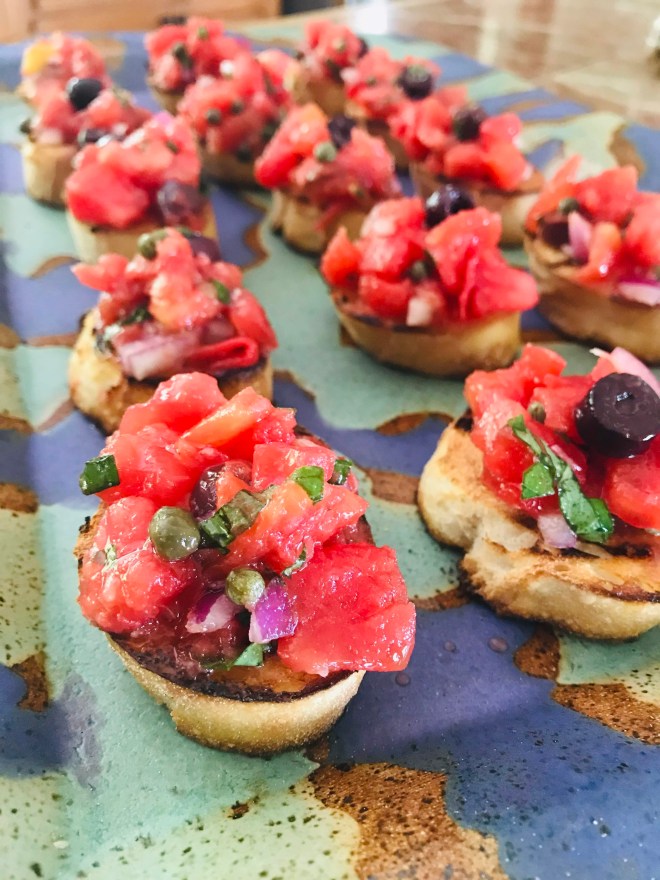
  6. Serve with crackers of choice. (I use crostini)

Yield: 3 cups

“A recipe has no soul.  You. As a cook bring soul to the recipe.”  — Thomas Keller


Earthly Delights

It feels like fall today.  Our weather and climate is unpredictable.  This has been our most unusual farm year.  Vegetables that normally grow without issue have struggled or been unable to grow at all.  This has not been a singular issue.  Many of our customers that have small gardens are wondering why they can’t grow certain vegetable this year.  Although there is no definite answer, as Dylan said, “The times they are a changing.”

Although change is definite, it instructs us to be fully present each day to the small miracles that surround us.  Comfort comes in many forms and simple pleasures can sometimes bring the most well-being.  Today it came in the form of warmth.   Our Katadin potatoes are the old Irish famine potato; earthy, creamy, with thin skins, they are exceptional in taste and texture.  When I first came to the farm I thought that a potato was a potato; until I tasted these remarkable spuds.  If you don’t have access to this particular variety, you can use russets.  It’s important to use a variety that breaks down slightly when cooked.  The advantage is a creamy soup without the use of heavy cream.  Make sure you use fresh dill.  It elevates this soup to something distinctive. Although the ingredients are simple, the soup is heavenly.

POTATO LEEK SOUP

INGREDIENTS:

  • 3 pounds of Katadin (or russet) potatoes, scrubbed and cut into chunks
  • 3 medium leeks, using white and pale green parts, scrubbed and sliced thinly
  • 3 tablespoons unsalted butter (I use Kerrygold)
  • 2 teaspoons sea salt, (I use Maldon)
  • 1/4 cup fresh dill, chopped

DIRECTIONS:

  1. In a large pot, over medium-high heat, melt the butter then add the leeks and saute until soft, about 4-6 minutes.  Add the potatoes and salt; then water to cover the potatoes by about an inch.  Bring to a boil, then turn down to medium and cook until the potatoes are soft. (When using fresh potatoes, be aware that these cook much faster than other potatoes that have been cured, or harvested many months earlier).  Taste for salt, add more if needed.
  2. With an immersion blender, blend the soup to thicken, leaving a far amount of chunks.  Add half of the fresh dill.
  3. Ladle into bowls and top with additional dill.

Serves 4-6

4a35ceb7-e014-4f06-8720-0ce8273eadc3

“There is nothing like soup. It is by nature eccentric: no two are ever alike, unless of course you get your soup in a can.” — Laurie Colwin

The Reason For The Season

I know….another tomato post.  I’m slightly obsessed; this is what happens when you pull hundreds of pounds of them from the field several times a week.  In the summer I live for two things: garlic and tomatoes.  Focusing on my two loves helps me to deal with what I don’t love, which is the heat and humidity.  When I’m in my happy place (the kitchen) it makes it all worthwhile.

This particular dish, which ends up being two dishes in one; brings tears to my eyes the first time I make it each year.  I don’t think there is anything that compares to this simple sauce that can only be made when tomatoes are at their peak.  The reason it ends up being two dishes in one is I take a portion of it out and use it for a bruchetta topping.  I know that means tomatoes for the appetizer and tomatoes for dinner, but so far no one has ever complained.  Although it is slightly labor intensive, it is worth every delicious mouthful!

Start with about 30 dead-on ripe paste tomatoes.  This will serve 4 for dinner and enough bruchetta topping for a loaf of French bread.  Don’t be fooled by the simplicity of the ingredients.  I literally have friends begging me to make it for them.  After all, it is the reason for the season!

img_4966

img_4967

INGREDIENTS:

  • 30 ripe paste tomatoes
  • 2 heads of garlic, peeled, separated and divided in half, grated on micro plane
  • 1 tablespoon, plus 2 teaspoons sea salt, divided (I use Maldon)
  • 1/2 – 1 cup good quality extra-virgin olive oil
  • 1/4 cup fresh basil, coarsely chopped, divided
  • 16 ounces linguine, cooked to package directions
  • 2 cup grated pecorino cheese (optional)

ADDITIONS FOR BRUCHETTA:

  • 1/2 cup red onion, finely chopped
  • 1/4 cup capers, drained
  • 1/2 cup Kalamata olives, sliced
  • 1 loaf fresh French bread (baguette)

img_4968

DIRECTIONS:

  1. Place a large pot on high, 3/4 filled with water and bring to a boil.  With a sharp knife, cut an “X” on the top of each tomato, through the core.  Fill your kitchen sink with cold water.  Carefully place groups of 8 in the boiling water.  Set a timer for 3 minutes.  With a large slotted spoon, pull blanched tomatoes from boiling water and place in sink with cold water.  Repeat this process until you have blanched all your tomatoes.
  2. Assemble the following: large cutting board, paring knife, serrated knife, two large bowls.  Cut the top of a tomato about 1/2 inch from top and throw in your bowl of scraps.  Next with your paring knife, peel off the skin (it should come of with ease if your tomatoes were ripe).  With your serrated knife, cut the tomato in half lengthwise; scoop out the seeds with your thumb and place it in the other bowl.  Repeat this process until you have peeled and seeded all your tomatoes over the bowl.  You will strain this later to collect your juice.
  3. Take each tomato half and chop it in small pieces.  Place pieces in large ceramic or pottery bowl.  I generally use 2/3 of tomatoes for sauce and the other 1/3 of the tomatoes for the bruchetta.  In a 4 cup Pyrex measuring cup, strain your tomato scraps through a wire mesh strainer.  This will give you approximately 1 cup of juice.
  4. To the large bowl add the following: 1 head of grated garlic, 1 tablespoon sea salt (do NOT be afraid of the salt), half of the basil, and 2/3 of your reserved juice.  Next start with 1/2 cup of extra-virgin olive oil in your large bowl.  Stir gently but thoroughly.  You want it to be fairly soupy.  Add up to 1/4 cup more olive oil if needed.  Let macerate on your counter for at least 2 hours, up to 4 hours. DO NOT REFRIGERATE!
  5. Cook your linguine according to package directions and drain.  In a large pasta bowl, place the drained pasta and top it with the sauce.  Pass cheese.

img_4977

img_4979

FOR BRUCHETTA:

img_4969

  1.  In your smaller bowl add the garlic, capers, olives, red onion, basil, salt and remaining reserved juice.  Pour approximately 1/4-1/2 cup extra virgin olive oil over tomatoes.  Stir gently but thoroughly.  Again you want it somewhat soupy.  The liquid will delightfully soak into your grilled bread slices.  Let this macerate on your counter for the same amount of time.
  2. Slice up your baguette in 1 inch pieces.  Heat a gas grill on high, then turn down to medium.  Place your slices on grill for about 3-5 minutes.  Turn over and grill the other side.  You are simply looking for some nice grill marks.  This can be done ahead of time.
  3. When you are ready to eat your bruchetta, top each piece with relish, making sure your are generous with the liquid.

img_4974

img_4976

Serves 4

“Nothing is work unless you’d rather be doing something else.”  –Peter Pan

Lovin Spoonful

Boy, are we rocking the tomatoes.  We are in tomato nirvana!  BBLT’s, roasted tomato sauce, cherry tomato soup, tomato confit, caprese salad, uncooked tomato sauce, bruchetta and tomato risotto.  I wait for this time of our farm season and will eat, prep and can as many variations as I can imagine.  My time is limited but this is truly a labor of love.

Last Thursday evening was the tomato risotto.  For those of you who have followed this blog, you are aware of my roasted tomato sauce; which is a combination of all our varieties cut up and roughly seeded, mounded in a roasting pan with 2 heads of garlic, olive oil and salt.  This is roasted for 5-6 hours at 300 degrees.  Each hour I remove the macerated tomato stock with a ladle and can it for future use.  I use it in chilies, soups and risottos.  For those who don’t go through this approach, you can use tomato paste to intensify the chicken stock.  Either way, the result is luscious.   Cherry tomatoes add both sweetness and color.  Top with fresh basil and shaved pecorino and you have a show stopper.  There are two recipes each summer at peak tomato season that I am emotionally moved by when I make them; tomato risotto and uncooked tomato sauce.  It’s like eating the sun.

TOMATO RISOTTO

INGREDIENTS:

  • 5 cups chicken stock (preferably homemade) or 4 cups chicken stock mixed with  1 cup roasted tomato stock
  • 2 tablespoons extra-virgin olive oil, plus more for drizzling
  • 1 medium onion, finely chopped
  • 4 garlic cloves thinly sliced
  • 2 cups cherry tomatoes (I like Sweet 100’s)
  • 2 tablespoons tomato paste (omit if using the tomato stock)
  • 1/4 teaspoon ground cinnamon
  • 1 cup arborio or carnaroli rice
  • Kosher salt and freshly ground black pepper to taste
  • 2 tablespoons unsalted butter (I prefer Kerrygold)
  • 1 cup finely grated pecorino cheese, plus 1/4 cup shaved for serving
  • Fresh basil, chopped, for serving

img_4948

DIRECTIONS:

  1. Bring stock to a simmer in a medium saucepan; keep warm over medium-low heat until ready to use.
  2. Meanwhile, heat 2 tablespoons olive oil in a large saucepan over medium.  Add onion and cook, stirring often, until golden and very soft, 8-10 minutes.  Add garlic and cook, stirring until softened, about 1 minute.  Add tomato paste if using, and cook stirring often, until it darkens slightly and begins to stick to pan, about 2 minutes.  Add cherry tomatoes and cinnamon, and cook, stirring often, until some of the tomatoes start to burst, about 2-4 minutes.
  3. Stir in rice, season with salt, and reduce heat to medium-low.  Cook, stirring, until some grains are translucent, about 3 minutes.  Ladle in 2 cups of stock and simmer, stirring frequently, until completely absorbed, 8-10 minutes.  Ladle in another 2 cups of stock and simmer, stirring frequently, until rice is cooked through and most of the stock is absorbed, 12-15 minutes.
  4. Add butter and grated pecorino, and remaining 1 cup of stock, stirring constantly, until risotto is very creamy looking, about 4 minutes.  Taste and season with additional salt if needed.  Add freshly ground black pepper to taste.
  5. Divide risotto among shallow bowls and top with chopped fresh basil leaves, additional olive oil and shavings of pecorino.

Serves 4

ea34458d-9415-44b6-911d-4b1fc1b41600-1

“A world without tomatoes is like a string quartet without violins.”  –Laurie Colwin

Spread The Wealth

One of the outstanding things about summer is the abundance of fresh produce.  When looking for inspiration, I’m frequently inspired by America’s rich immigrant cultures.  I keep returning to the Mediterranean.  Their foods are creative, savory and delicious.

I am crazy about tomatoes, eggplant and garlic.  Alone or in combination they continue to be flavors with endless possibility.  I love a good baba ganoush or baba ghnouj, an eggplant dip typically made with roasted eggplant, tahini, olive oil and lemon juice. When I came across recipes from the Lebanese heritage using slightly different ingredients to make a thicker spread called Borani-E Badenjan I couldn’t wait to try it.  It had all the ingredients I love, including caramelized onion, garlic and yogurt.  I frequently freeze large batches of caramelized onions, since they are one of our main crops.  I have them at the ready to be used in anything from dips, to pizza.  I’ve written the recipe to include cooking the onion specifically as you make the spread.  I like to eat it with pita, cucumbers and/or carrots.

EGGPLANT AND YOGURT SPREAD (BORANI-E BADENJAN)

INGREDIENTS:

  • 2 large eggplants (a little over a pound)
  • 1/4 cup extra-virgin olive oil
  • 1 medium onion, halved lengthwise and cut into thin slices
  • 1 cloves garlic, grated on a microplane
  • Sea salt and freshly ground black pepper to taste
  • 1/2 cup Greek yogurt
  • 1/2 teaspoon sumac
  • 1/3 cup walnuts, coarsely chopped
  • Fresh pita for serving

img_4905

img_4915

DIRECTIONS:

  1.  Preheat the broiler to high (alternately, you can do this on a gas grill).  Prick the eggplants in several places with the tip of a knife and place under the hot broiler or on a gas grill.  Broil or grill for 30-40 minutes, turning them halfway through, until the skin is charred and the flesh is very soft.  Halve the frilled eggplant lengthwise.  Scoop out the flesh and place in a colander for about 30 minutes to drain off the excess liquid.
  2. Heat the olive oil in skillet over medium-high heat.  Add the onion and cook until soft and lightly golden, about 5-8 minutes.  Add the garlic and saute for another minute or so.  In a food processor, add the eggplant, onions, and season with salt and pepper to taste.  Process until smooth.
  3. Stir the yogurt, and sumac into the cooled mixture.  Transfer to a serving dish.  Drizzle with  olive oil and sprinkle with a few saffron threads or 1/4 teaspoon sumac.  Top with chopped walnuts.  Serve with pita.

Yields: 1-2 cups

img_4878-1

 “The only thing I like better than talking about food is eating” – John Walters

Cherry….Cherry Baby!

Here at the farm, we try to use whatever the land serves up; whether perfect, imperfect or abundance overload.  As we wait somewhat impatiently for our summer slicing tomatoes, we are totally excited that our cherry tomatoes are producing their delicious little orbs.  When they come on strong, as they are now, we take tons to market; but the real excitement is when I start roasting them for cherry tomato soup!  I love to stock the larder each year, and this is often where I start.  Using Sun Gold and Sweet 100’s separately or combined will offer up some of the best tomato soup you have ever tasted, and it uses only 4 ingredients! As a farmer I will have to say that the variety of cherry tomatoes does matter.  Taste your produce before purchasing to make sure yours are sweet and flavorful.  For those of you not inclined to can your produce, this soup freezes well in pint containers.  I roast two large sheet pans at a time, which will yield 5 pints of soup.  This is also when you can use your frozen roasted garlic cubes (from a previous blog post) adding it to your blender for additional depth.

When the weather gets cold (and it will get cold!) it is a real pleasure to open up a pint of this soup; top it with homemade croutons or basil oil as a starter.  And of coarse you will never go wrong with a white cheddar grilled cheese sandwich to dunk in a steaming bowl of this deliciousness for lunch!

img_4872

ROASTED CHERRY TOMATO SOUP

INGREDIENTS:

  • 8 pounds of cherry tomatoes (a pint is a pound the world round)
  • 2 heads of garlic, cloves separated, peeled and divided (skip this step if using your frozen roasted garlic cubes
  • 1/2 cup extra-virgin olive oil, divided
  • 2 teaspoons sea salt (I use Maldon), divided

DIRECTIONS:

  1. Preheat oven to 400 degrees F.  Using two large rimmed baking sheets, place 4 pounds of cherry tomatoes in each one.  Sprinkle one peeled and separated head of garlic on each sheet pan.
  2. Sprinkle 1/4 cup olive oil over each pan and with the palms of your hands, roll the tomatoes around until they are all evenly coated with oil.
  3. Sprinkle 1 teaspoon of sea salt over each sheet pan.
  4. Roast for 30-40 minutes or until tomatoes are slightly colored and bursting; turning sheets from top to bottom halfway through.  Remove from oven and let cool.
  5. Prepare 5 pints for canning or freezing.  If you have a Vita Mix use it.  I can usually get one sheet pan per blender batch.  If you are using your frozen roasted garlic cubes, add one cube per batch.  Blend thoroughly and taste for salt.  Add more if needed.  In a large bowl with a wire mesh strainer over it; pour half the tomato mixture into the strainer and scrape a silicone spatula over the bottom to remove  skin and/or seeds.  (you can skip this step if the seeds don’t bother you; I like my soup with a silky texture)  Pour into pint jars leaving 1/2 inch headroom or freezer containers leaving 1 inch headroom.  Repeat process with second sheet pan.
  6. Water bath pints for 15 minutes or freeze.

img_3106

img_3108

Yields: 5 pints

“There is nothing that tomato soup and a grilled cheese sandwich can’t fix!”


We Should All Roast Garlic

Ok….I put up a lot of food during the farm year.  After my post yesterday I did another round of roasted garlic.  With a portion of that garlic I made a pasta sauce that my wife Val said, “F…ing rocks!”  This is a brief but savory post of that creation.

ROASTED GARLIC PASTA

INGREDIENTS:

  • 1 cup roasted garlic cloves
  • 1 cup chicken or vegetable stock
  • 1/2 teaspoon sea salt
  • 8 ounces linguine pasta
  • 3 cups baby arugula or spinach
  • 1 cup cherry tomatoes, halved
  • 1/4 cup toasted bread crumbs
  • 2 tablespoons Pecorino, grated

img_4860

DIRECTIONS:

  1.  Heat 8 cups of salted water in a large sauce pan on high until boiling.  Cook linguine according to package directions.  Drain.
  2. While pasta is cooking, put 1 cup of roasted garlic, with 1 cup of chicken or vegetable stock and the salt in a quart Mason jar, and blend with a stick blender until smooth.
  3. Return the pasta to the pot and add the blended sauce.  Add the arugula and toss until wilted.  Place pasta in bowls and top with Pecorino and breadcrumbs.. then top with halved cherry tomatoes.  Serve.

Serves 2-4

img_4855

“You can never have enough garlic.  With enough garlic you can eat the New York Times. 

—Morley Safer

And The Walls Came Tumbling Down

What is it about walls that seems to bring out a collective reaction of distaste?  Let’s face it our political discourse has taken on a polarized view of such things.  But the wall I’m referring to is a wall we can all agree on.  Brickyard Farms uses “The Wall” to showcase our amazing hard-neck garlic.  The first week we have German White and the next week is for Music (yes the hills are alive).  It is incredibly satisfying to sell about 2500 head of garlic each of those weeks.  For those of you not familiar with hard-neck garlic, it is distinctly different from the soft-neck garlic you purchase in your local grocery store.  Most soft-neck garlic is grown in China and is required by law to be refrigerated during overseas transport.  When garlic is refrigerated it changes the sugars to starch and makes the garlic bitter.  It also signals to the garlic that spring has arrived and it needs to grow.  This is why you typically find a green sprout in the center of each clove.

img_4830

img_4831-1

Many of our customers purchase in bulk; anywhere from 60-250 at a time.  We are humbled by the support and enthusiasm over the years for this savory allium.  We typically store 200 heads for our personal consumption.  In addition to this I roast an additional hundred head to use in soups and stews.  When garlic is roasted it becomes beautifully sweet and nutty.  Typically garlic is roasted as a whole head with most of its papers in tact.  You simply cut the tips of each clove, baste it with olive oil, wrap it in foil and roast it in a 375 oven or on your grill for 50-60 minutes.  This works well when you are thinking of a luscious appetizer; but I want to freeze it for future use.  The method I describe here will yield two six-cube silicone ice cube trays of roasted garlic; each cube being the amount of one large head of garlic (although you can purchase bulk quantities of pre-peeled garlic I would NOT recommend it).  My suggestion is that you go to your local farmers market and stock up!  Fresh garlic season is usually July-August; and if you’ve never had fresh garlic you are in for an incredible treat!  Once they’re frozen, you just pop out the cubes and place them in a zip-lock freezer bag or container and they’re ready for something yummy when you are.

Roasted Garlic In Quantity

img_4836

Ingredients:

  • 15-20 medium size heads of garlic (remember, fresh is best)
  • Good quality extra-virgin olive oil
  • 1 teaspoon coarse sea salt (I use Maldon)

METHOD:

  1. Preheat oven to 375 degrees F.  Peel all your garlic and place in an 8×8 or 9×9 ceramic dish.
  2. Pour enough olive oil in the dish to cover the garlic cloves halfway.  Toss to coat.
  3. Sprinkle coarse salt over garlic and cover with aluminum foil.
  4. Roast in oven for 30 minutes, then remove foil.  Roast for an additional 30 minutes or until soft and slightly golden.  Let cool.  Place in ice cube trays using any oil in the dish to cover each cube (I use a teaspoon in each one, then cover with additional oil if needed).
  5. Freeze overnight.  Remove from trays and put in zip lock bags or freezer containers.

img_4833

img_4834

img_4835

img_4848

“There is no such thing as a little garlic!”  —Arthur Baer


Wild Thing

Boy, are we ever having a heat wave!  Just in time for harvesting our 5500 heads of garlic.  The good news is it’s great for garlic; not so much for us garlic diggers and cleaners.  We get up early while the heat is bearable, then stop by midday to avoid becoming ill.  This is definitely the time of year for simplicity in the kitchen.  You can always throw something on the grill, but I really go for meal salads.  They don’t heat up the kitchen, and you can munch on them for a few days.  Virtually any grain or bean will work well, combined with vegetables of your choice.  I go for texture differences whenever possible; which usually means crunch and savory elements.  I’ve been making this salad for decades.  It’s great for a picnic (no mayo) and can be doubled or tripled to serve a crowd.

WILD RICE SALAD

INGREDIENTS:

  • 1 cup long grain wild rice, cooked, drained and cooled
  • 8 pieces of bacon, chopped, fried and drained
  • 2 cups celery, diced
  • 2 cups white onion, diced
  • 4 ounces white or brown mushrooms, stems removed, caps sliced
  • 2 cups curly parsley, chopped
  • 1 cup pecans or almonds, toasted

DRESSING:

  • 1/2 cup sunflower oil
  • 1/2 cup fresh lemon juice
  • Kosher salt and freshly ground black pepper to taste

img_4821

DIRECTIONS:

  1. Measure 3 cups water into a medium saucepan and add 1 teaspoon salt.  Bring to a boil and stir in wild rice.  Turn down to low, partially cover and cook for 40 minutes.  Drain in a wire colander and set aside to cool.
  2. Chop bacon, fry until crisp and drain on paper towels.  Set aside.
  3. In a large bowl, place cooled wild rice, with celery, onions, mushrooms, pecans and parsley.
  4. Place ingredients for dressing in a pint mason jar.  Seal with lid and shake vigorously.  Pour over salad and mix thoroughly but gently.
  5. Serve on a platter and top with crumbled bacon.

Serves 4-6

img_4822-1

“I love how summer just wraps its warm arms around you like a blanket.”  —Kelle Elmore

It’s Bean A Long Time Coming

This has not been a typical farm year for us.  Challenges with weather, deer, woodchucks and bunnies have made it difficult to grow our delicious haricot verts called Maxibels or as we call them at market, ‘skinny French girls’.  Finally after 3 tries we have succeeded in harvesting our first beans.  I wait all summer for certain vegetables.  Garlic, tomatoes and Maxibels.  I couldn’t wait to make this protein filled, colorful, crowd pleasing salad.  I did a Mediterranean spread today with our dear friends George and Karen.  Lamb meatballs in tomato sauce and feta, roasted beets with preserved lemon and dill, hummus salad, raw zucchini thyme and walnut salad, and this was a wonderful addition.

This salad has an assortment of textures; al dente green beans, toasted almonds, sweet cherry tomatoes, quinoa, chickpeas, onion and feta.  Although it originally calls for red onion, we had my favorite sweet onion Bianca and I substituted that variety (poetic license)  During the summer, after working all day on the farm, it’s nice to have meal salads that are simple to make and refreshing to eat.  Leftovers can be refrigerated for up to 3 days.  This salad can be doubled to serve a crowd.


img_4802

img_4804

HARICOT VERTS, QUINOA AND CHICKPEA SALAD

INGREDIENTS:

  • 1 cup quinoa (any color)
  • 1 3/4 cups water
  • 1 pound green beans (I like haricot verts) or a combination of yellow and green
  • 1 cup almond slivers, toasted
  • 1 can canned chickpeas, drained and rinsed
  • 1/2 small red onion  (or onion of your choice), thinly sliced vertically
  • 1/4 cup extra-virgin olive oil
  • 1/4 cup white wine vinegar (I used my homemade tarragon vinegar)
  • 1/2 teaspoon Dijon mustard
  • 1 tablespoon pure maple syrup
  • Kosher salt and freshly ground black pepper to taste
  • 3 ounces feta, crumbled (optional)
  • 1 cup cherry tomatoes, halved (any color)

DIRECTIONS:

  1. In a medium saucepan combine quinoa and cold water; bring to a boil over high heat.  Once boiling, cover and turn heat to low.  Cook for 20-25 minutes.  When finished pour onto sheet pan and let cool completely.
  2. Toast the almonds on a sheet pan in a 350 degree F oven for 5 minutes.  Remove from sheet pan and let cool.
  3. Wash and trim the beans.  In a large pot bring salted water to a boil and blanch beans for 3-6 minutes depending on the variety that you use.  Maxibels 3 minutes, traditional green beans 6 minutes.  Drain and place in ice bath to cool completely.
  4. To make vinaigrette, place olive oil, vinegar, mustard, maple syrup, and salt and pepper to taste in a pint mason jar.  Place lid on snugly and shake vigorously.
  5. To assemble, place cooled quinoa, drained green beans, onions and chickpeas in a large salad bowl.  Mix gently with your hands;  add 1/2 of the dressing and mix again with your hands.  Add almonds and additional dressing if needed.  Place salad on serving platter and top with crumbled feta and cherry tomatoes if using.  Serve immediately.

Serves 4 as a entree, 6-8 as a side

“Nothing is more memorable than a smell.  One scent can be unexpected, momentary and fleeting, yet conjure up a childhood summer beside a lake in the woods.  –Diane Ackerman

1 11 12 13 18