During these cooler autumn days, we often lean into our personal versions of comfort food. For many it’s soups, stews or casseroles. I enjoy casseroles and they can be delicious; but they often look like a blob of melted cheese. I’m someone who requires food to be good tasting, and visually appealing. As the saying goes, “you eat with your eyes.”
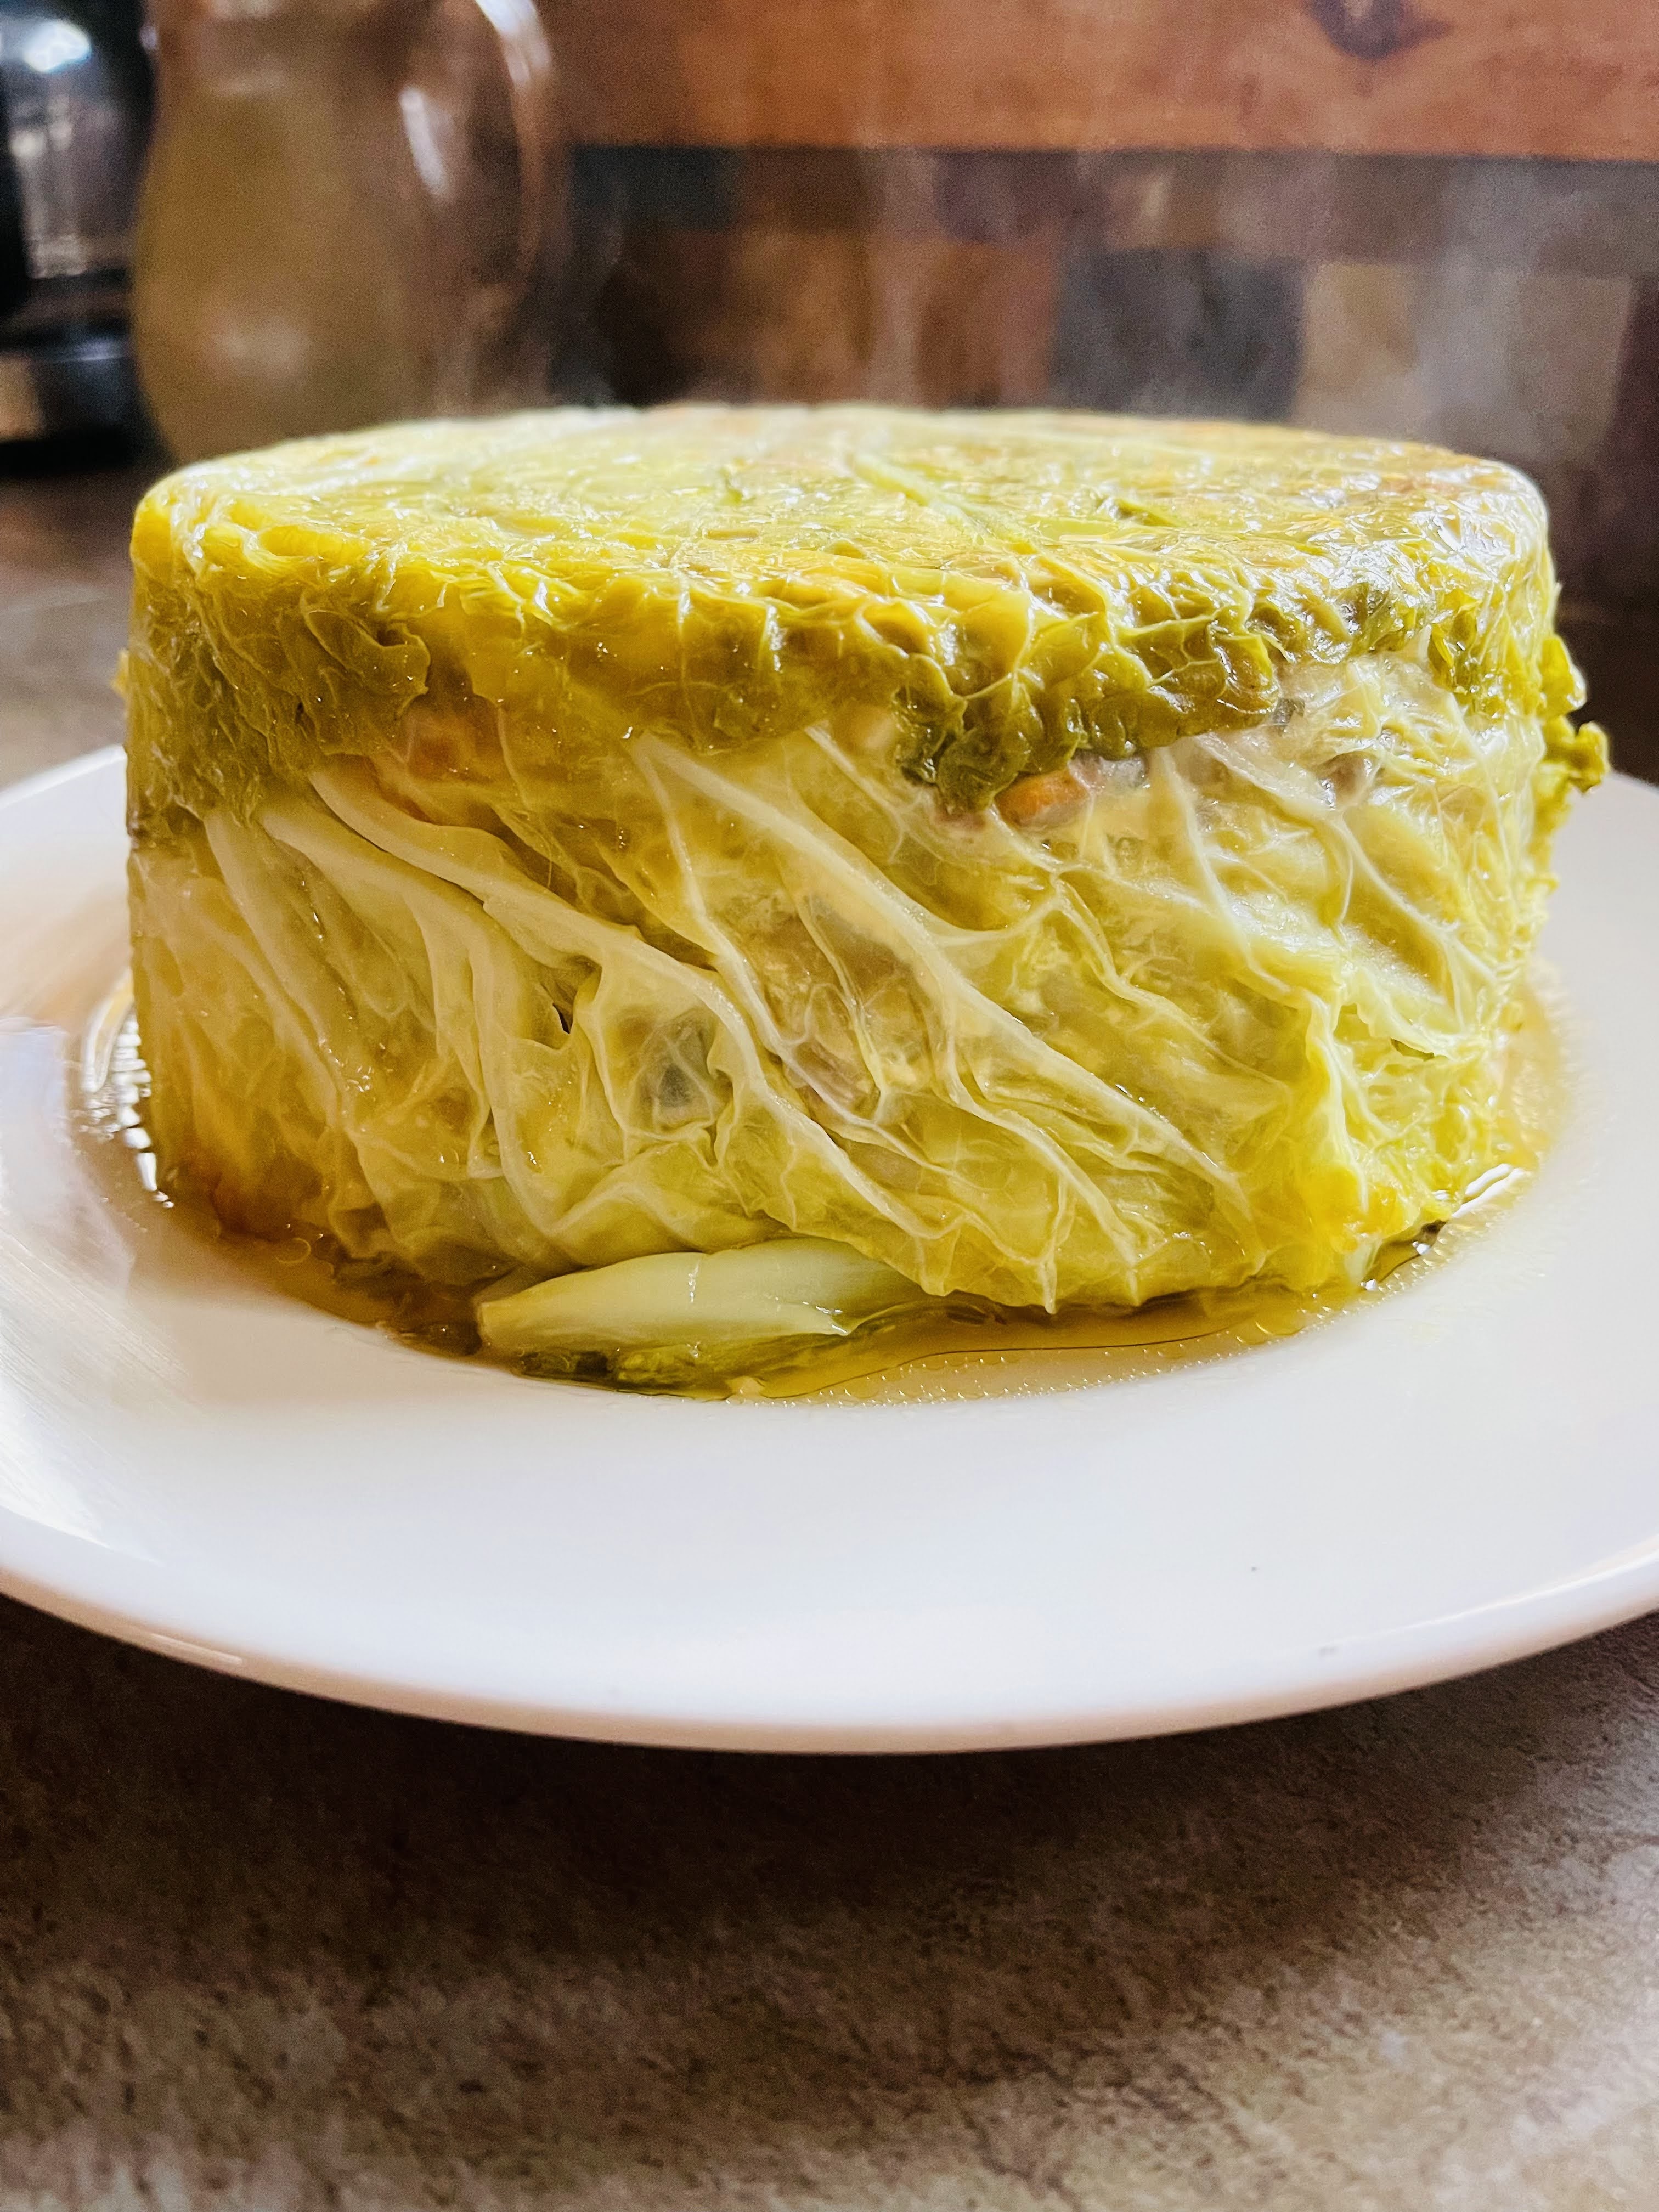
I’m a huge fan of Yotam Ottolenghi’s cauliflower cake and have made it several times. What a great way to present and eat vegetables. It covers all the bases. It’s creative, delicious and showy. So the other day when I picked up a beautiful head of savoy cabbage from the farmers market, I wanted to create something that showed off the deep veins in the leaves. Then it occured to me why not riff from the idea of cake, and make a cabbage roll on steroids? Well, it not only worked but will be on a regular rotation as the temperatures drop. Try it and see if you don’t agree!
STUFFED CABBAGE CAKE
INGREDIENTS:
- 1 large head of savoy cabbage
- 2 lbs of grass-fed ground lamb
- 1 medium yellow onion, diced
- 2 carrots, peeled and diced
- 1 cup red bell pepper, seeded and diced
- 4 large cloves of garlic, minced
- 1 cup pecorino cheese, grated
- 1 cup marinara sauce, or pasada
- 1 cup cooked jasmine rice
- 1 large egg
- Olive oil
- 1/2 cup fresh flat-leaf parsley, chopped
- Kosher salt and freshly ground black pepper to taste

INSTRUCTIONS:
- Core and separate the leaves from the savoy cabbage, by gently lifting them from the bottom of the cabbage, one leaf at a time. Continue until all large leaves have been removed. This should yield approximately 10-14 leaves. Cook the leaves in a large pot of salted, boiling water for 5 minutes. Drain, and place them in an ice bath to cool them down. Drain once again and place on a kitchen towel, pat them dry and set aside.
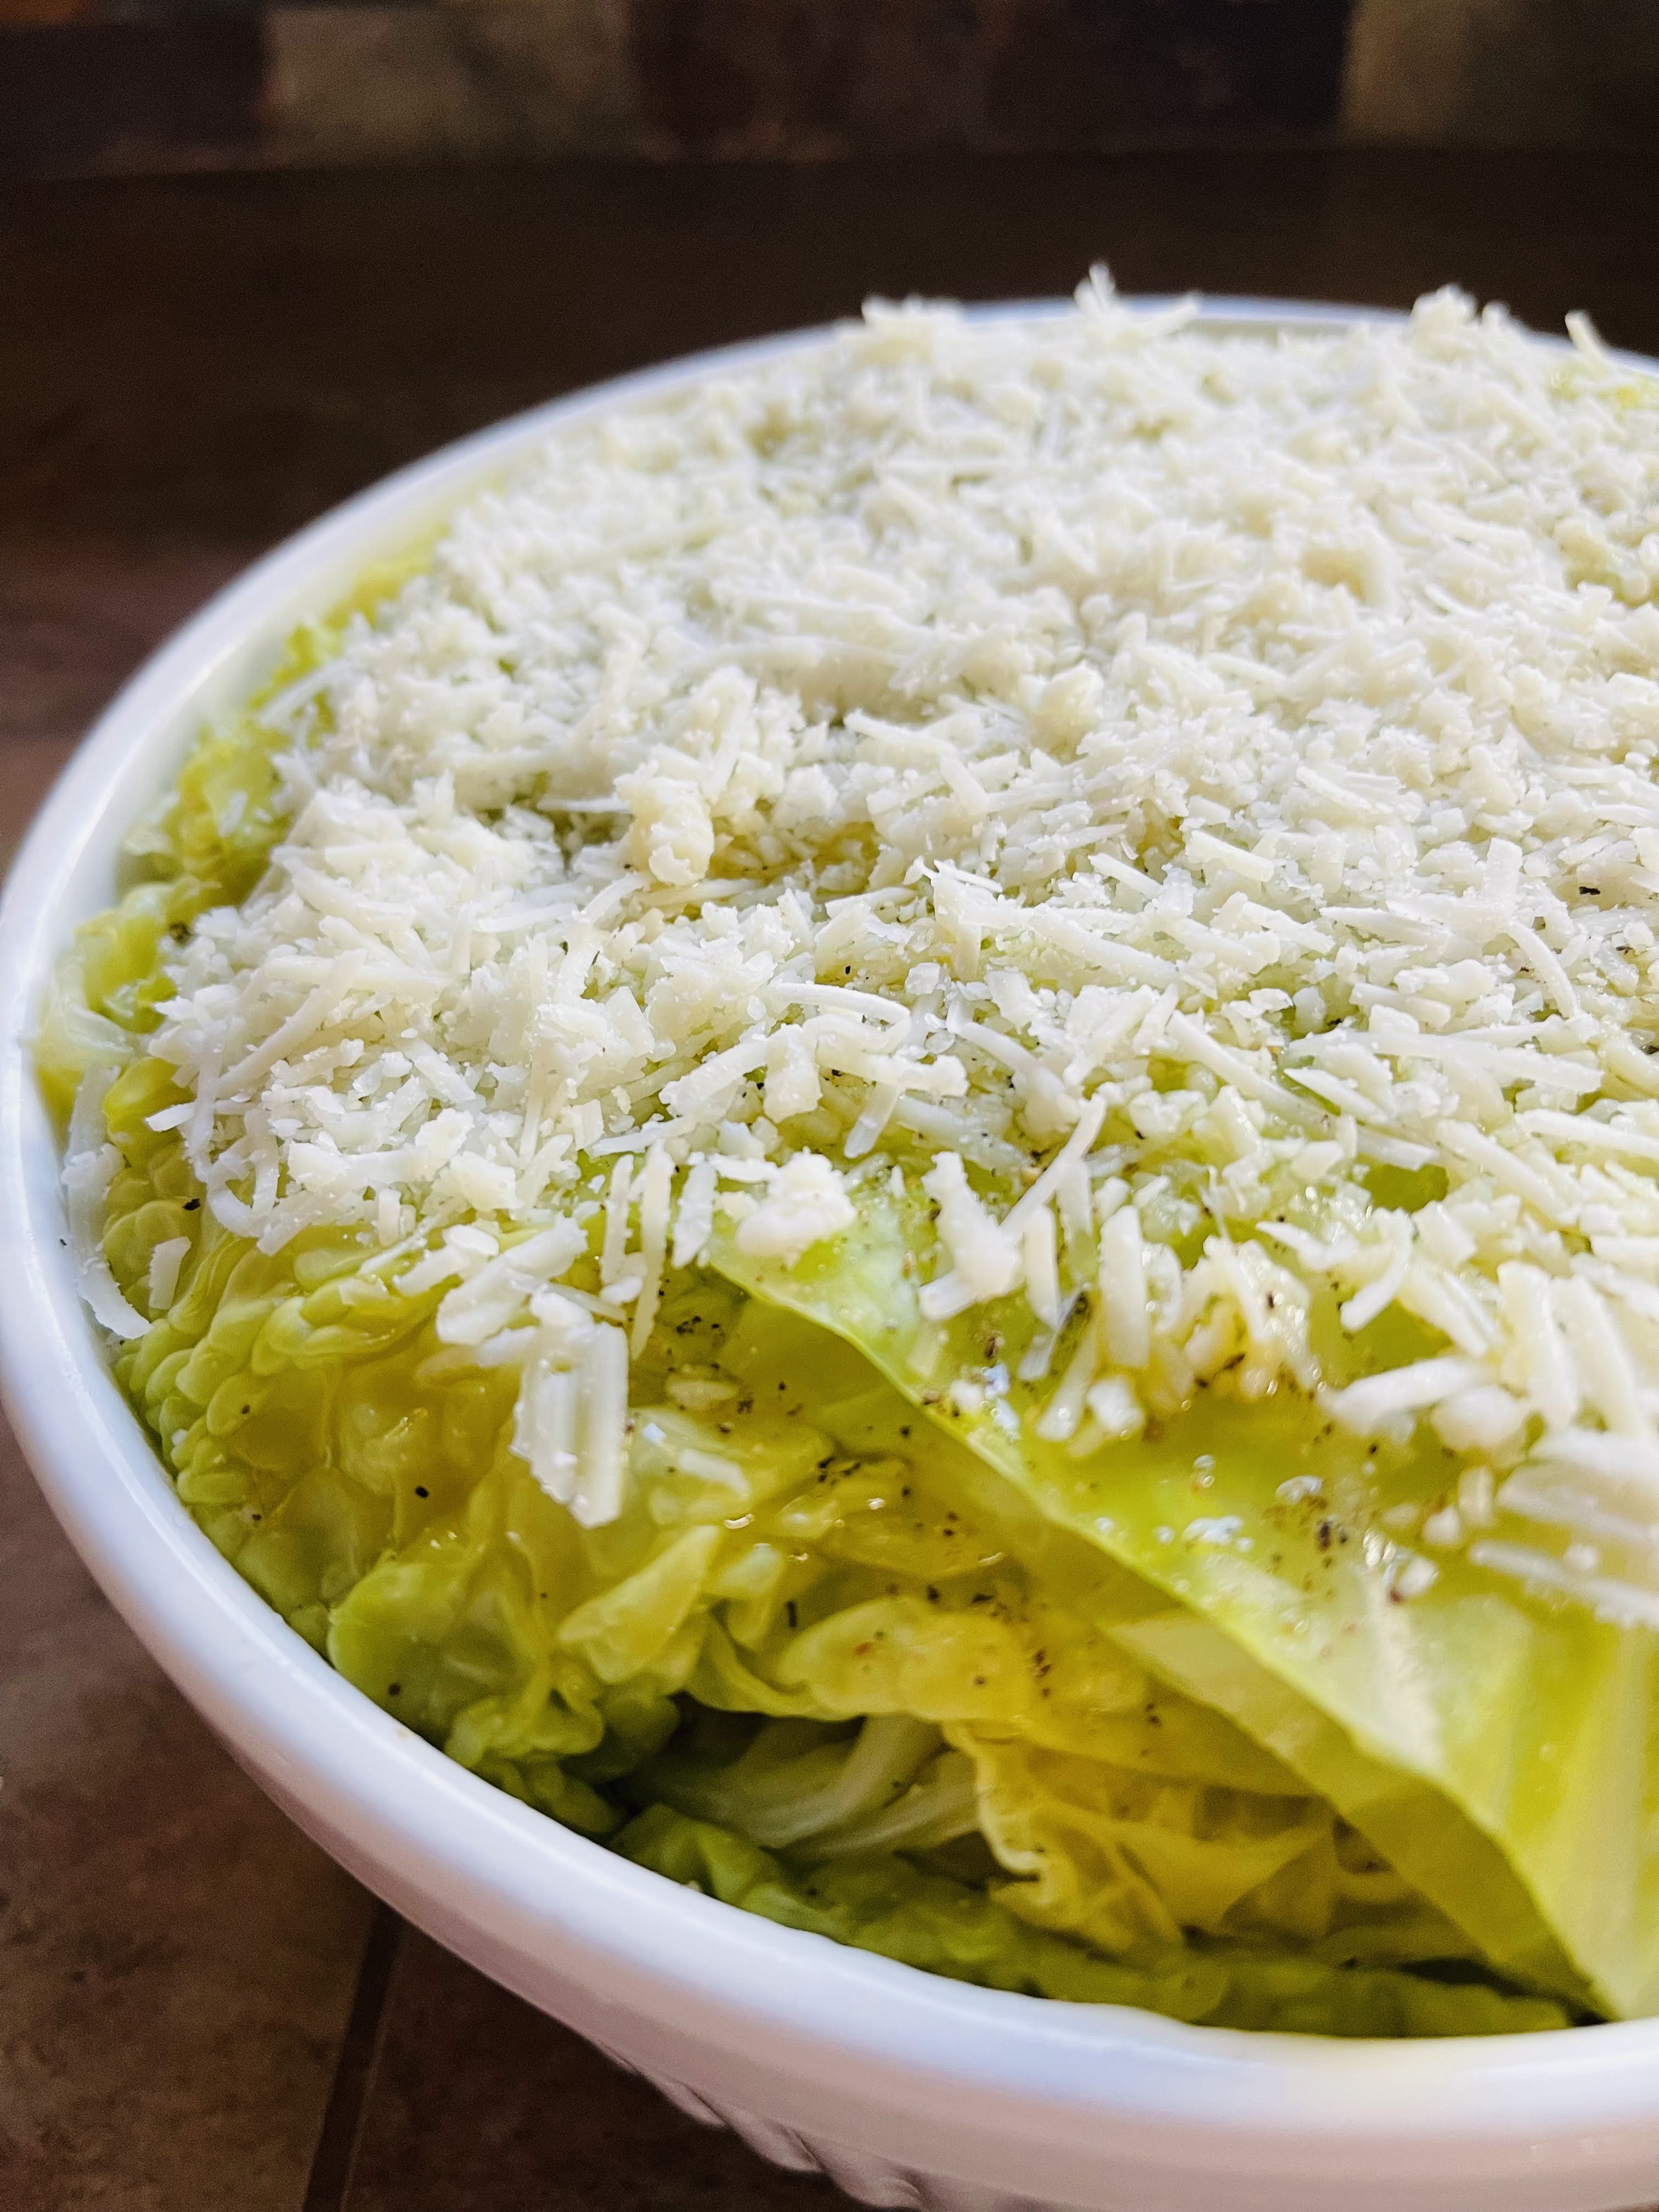
- Grease the bottom and sides of a deep souffle dish. Place a large attractive leaf on the bottom of dish, allowing it to partially curl up the sides of the dish. Then take 4 additional leaves, and place them from the center and up the sides of the souffle dish covering all the sides.
- In a large skillet, cook the ground lamb until it’s no longer pink. Drain if necessary and place in large bowl.
- Add 2 tablespoons of olive oil to the skillet and saute the onion, garlic, carrots and red pepper until soft, then toss it all together with the meat in the bowl and add the cooked rice. Add the chopped parsley, 1/2 the cheese, tomato sauce, egg and salt and pepper. Stir to thoroughly combine.
- Place 1/4 of mixture on top of cabbage in souffle dish. pushing it to the sides of the dish, then cover with 1 or 2 cabbage leaves depending on their size. Repeat, using 1/4 of filling at a time, then covering with 1 or 2 cabbage leaves. You should have 4 individual layers. Top this with 1 or two cabbage leaves, and fold in any additional leaves that are hanging over the sides of the dish.
- Cover the cabbage with remaining half of pecorino. Place in a 375 degree oven for 1 hour. Let it rest for 15 minutes, then invert a serving plate over the souffle dish and flip it over. Cut in 6 slices and serve with additional marinara sauce or passata and additional cheese.


“Cabbage: a familiar kitchen-garden vegetable about as large and wise as a man’s head.” —Ambrose Bierce